Publishing Articles to JS Camp
To create articles in JS Camp, you need to follow a few simple steps.
If you do not create articles, but want to correct an error or defect, then you can edit any article in a couple of clicks, how to do this is shown here. But first, you need to create a GitHub account, if not, and connect to the project. How to do this is shown below, in Step 00 and Step 01.

Sign up on GitHub
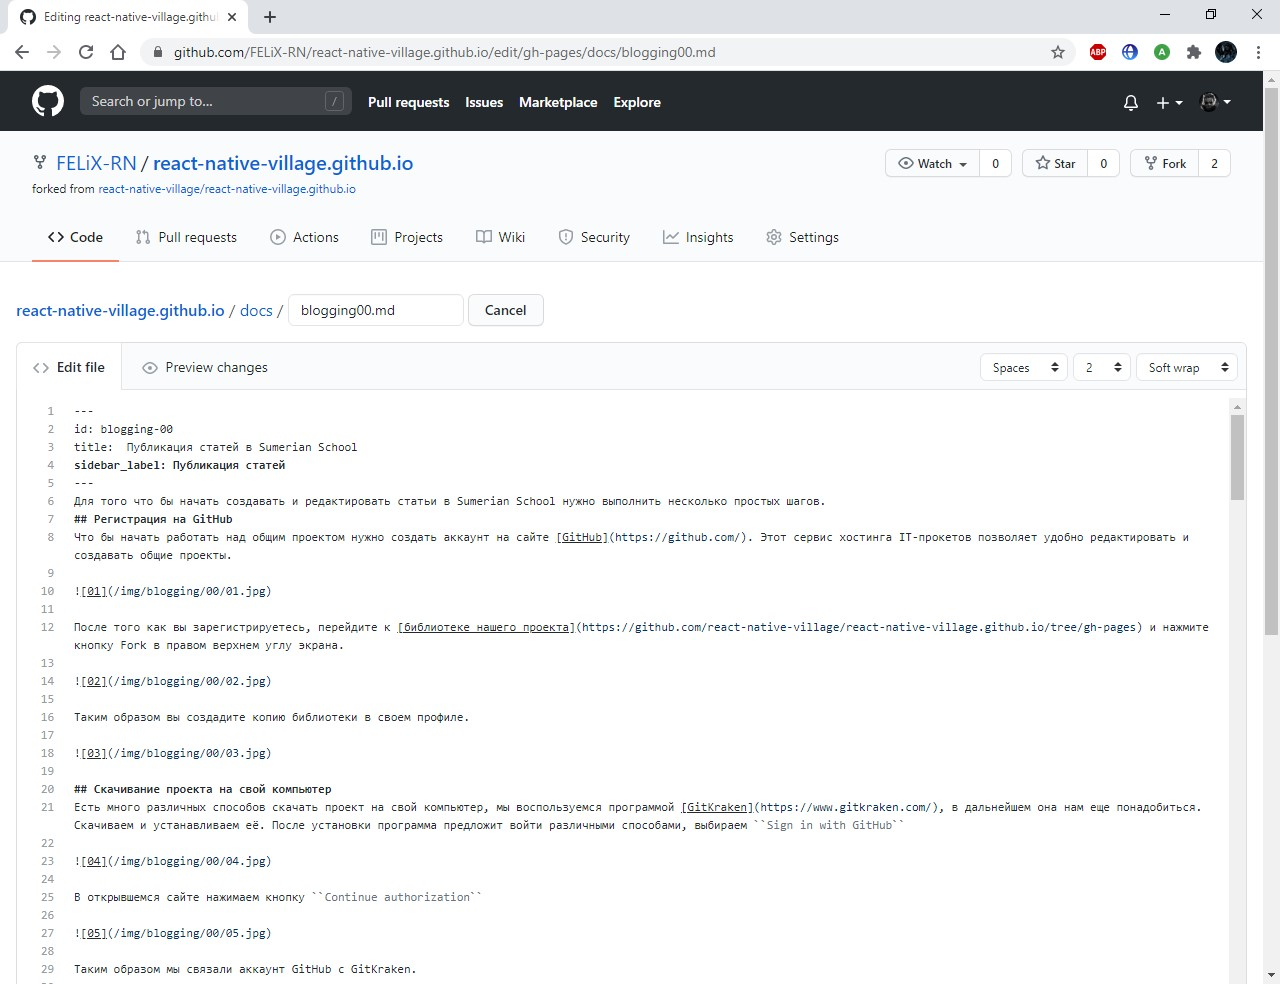
To work on a common project, you need to create an account on the [GitHub] website (https://github.com/). This is a hosting service for open IT projects that allows you to conveniently create and edit their common project for several programmers.

Connection to the project
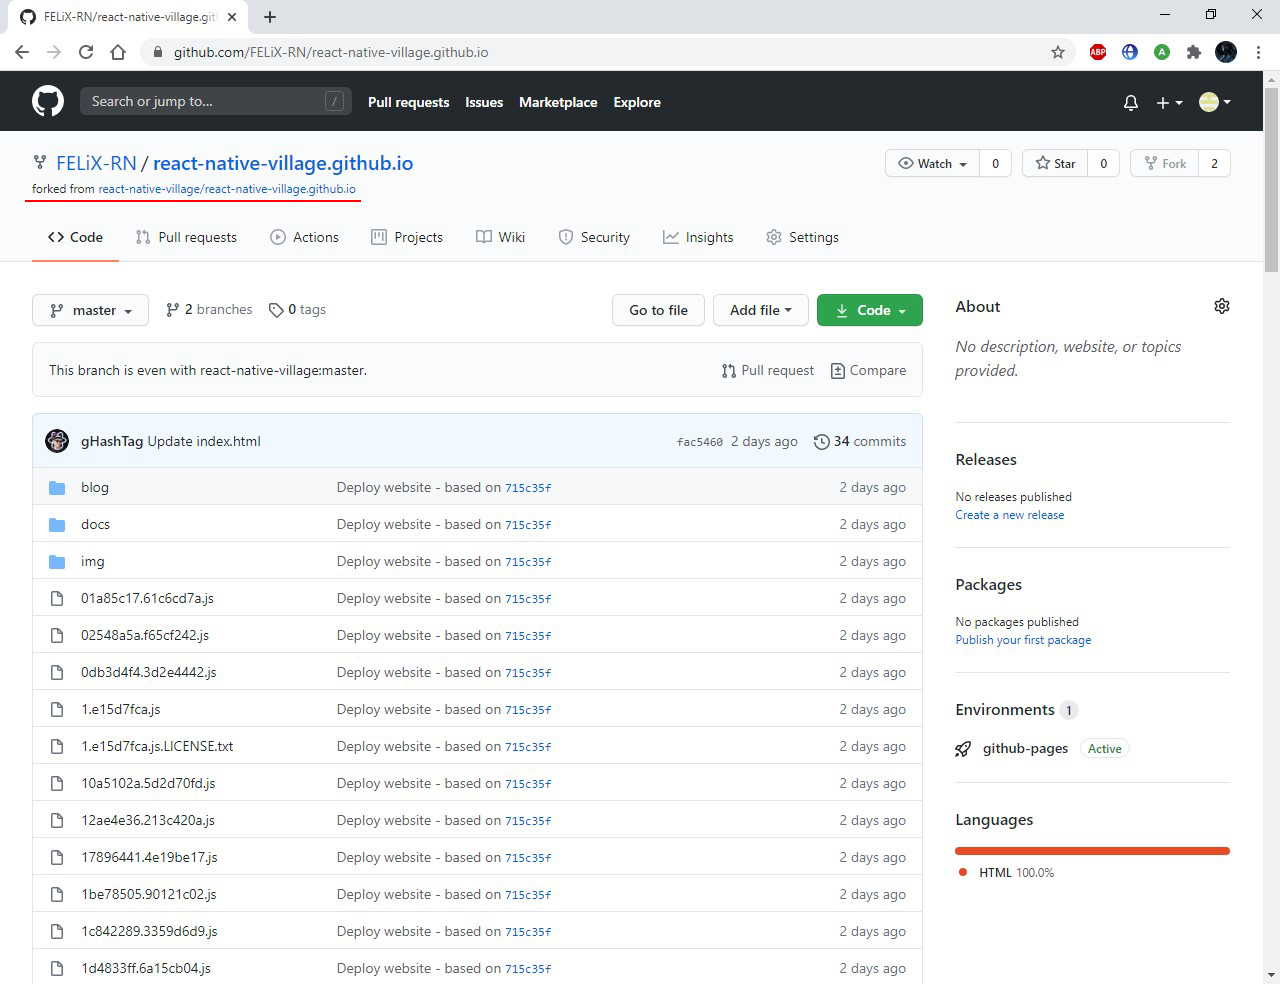
After registration, go to the library of our project (jscamp.app) and click the Fork button in the upper right corner of the screen.
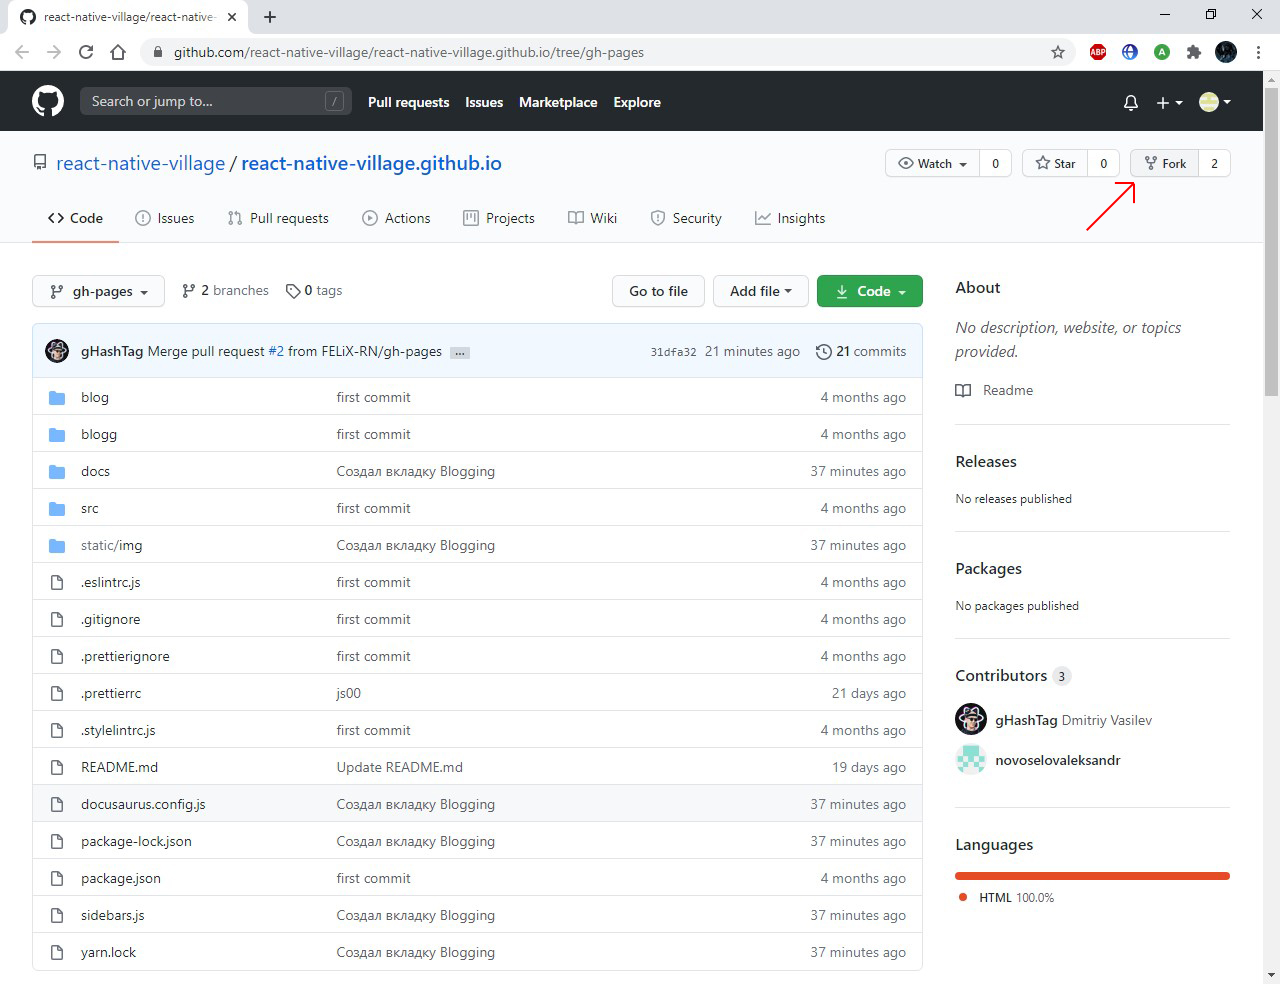
By doing this, in your profile, you create a copy of the library of the connected project.

Downloading the project to your computer
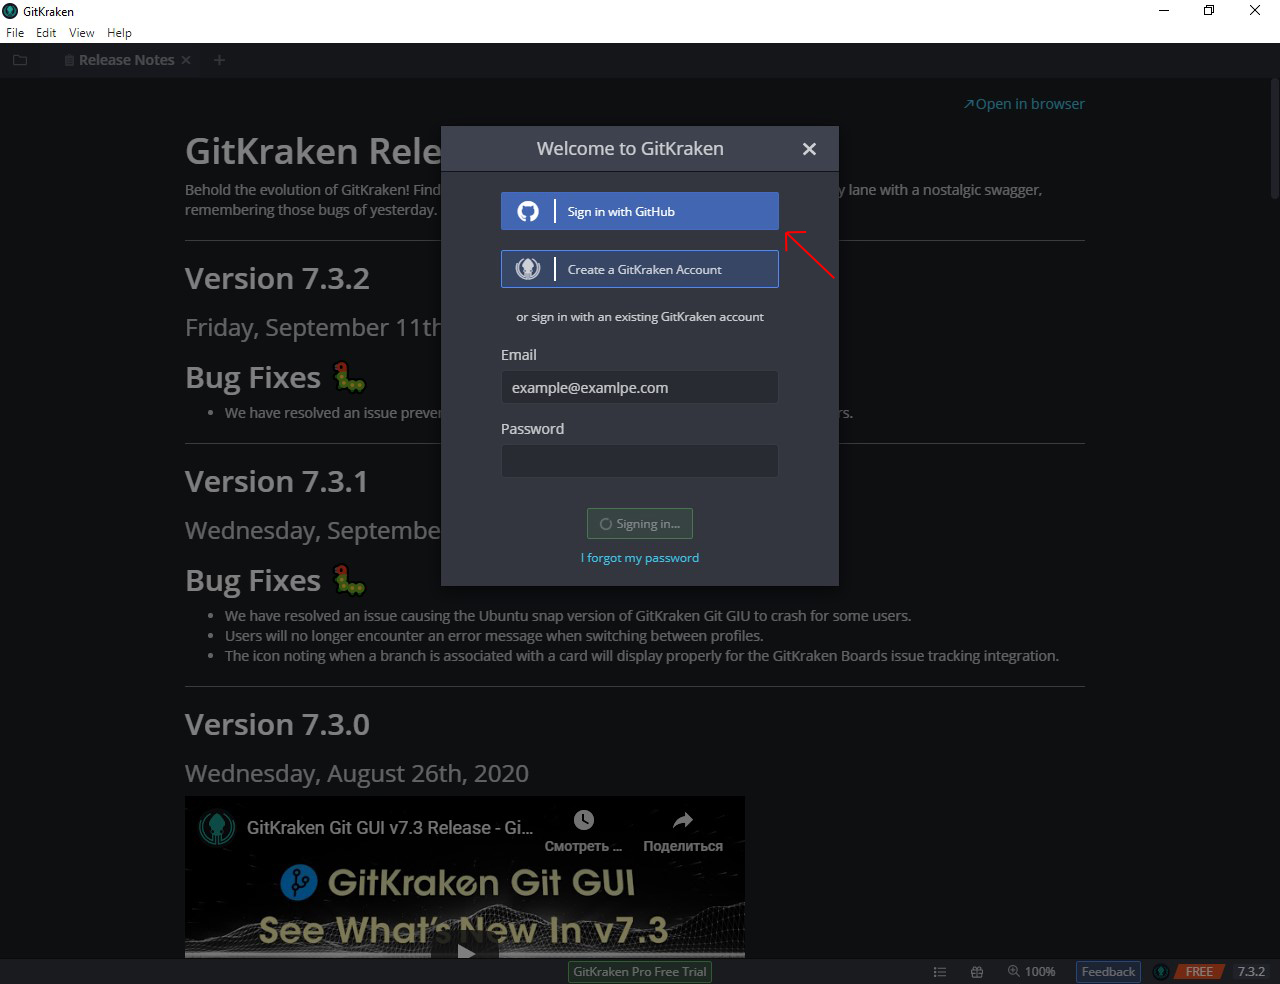
There are many ways to download a project to your computer, we will use the popular program for working with repositories GitKraken. Download and install. At the first start, the program will offer to enter in various ways, we suggest the item Sign in with GitHub, to synchronize GitKraken with the GitHub account.
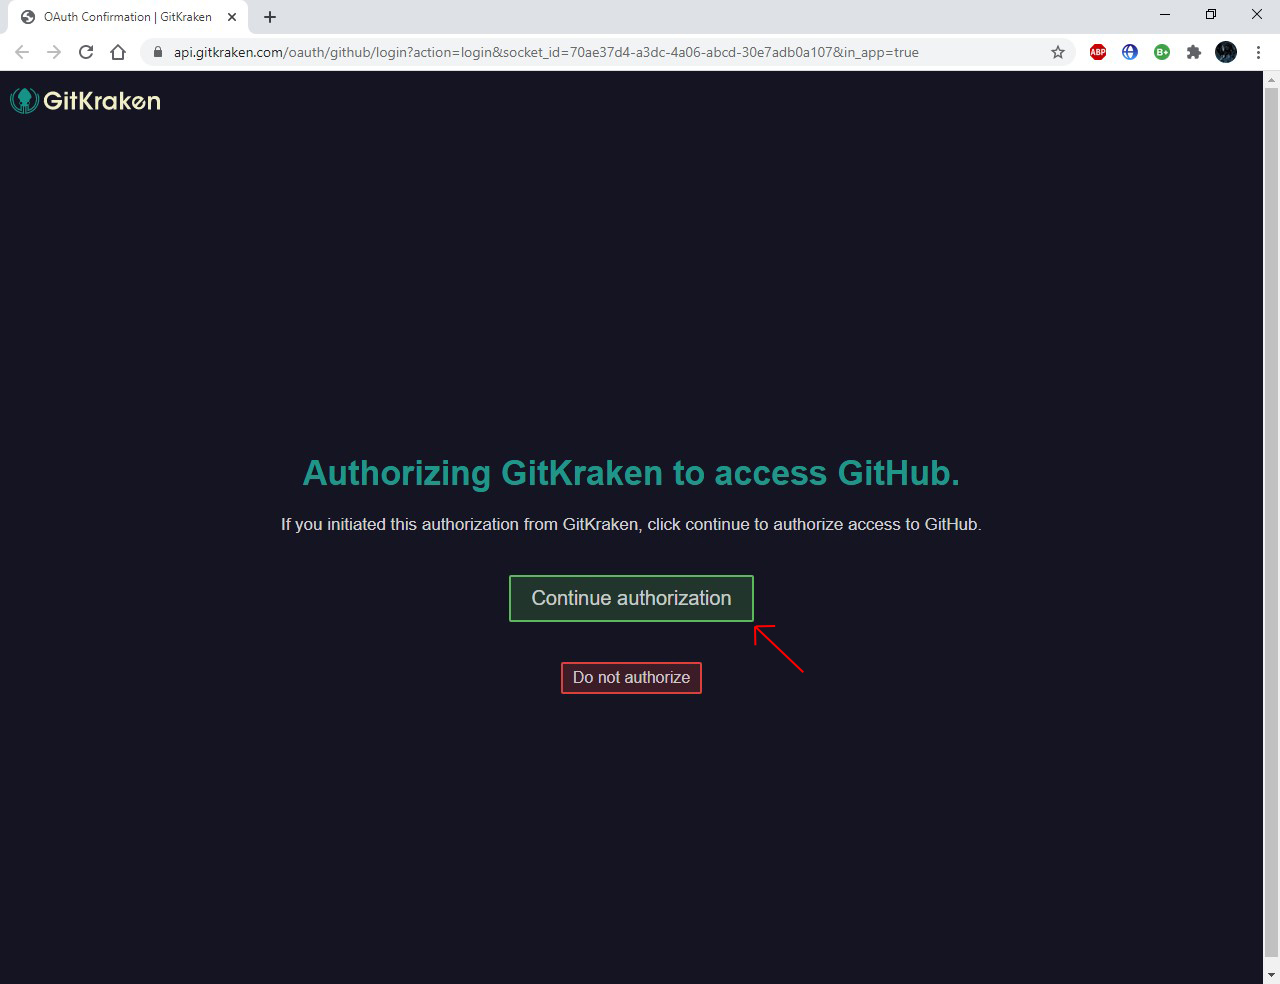
In the browser window that opens, select the Continue authorization button to continue authorization.
To complete registration, you will need to confirm the synchronization of accounts.
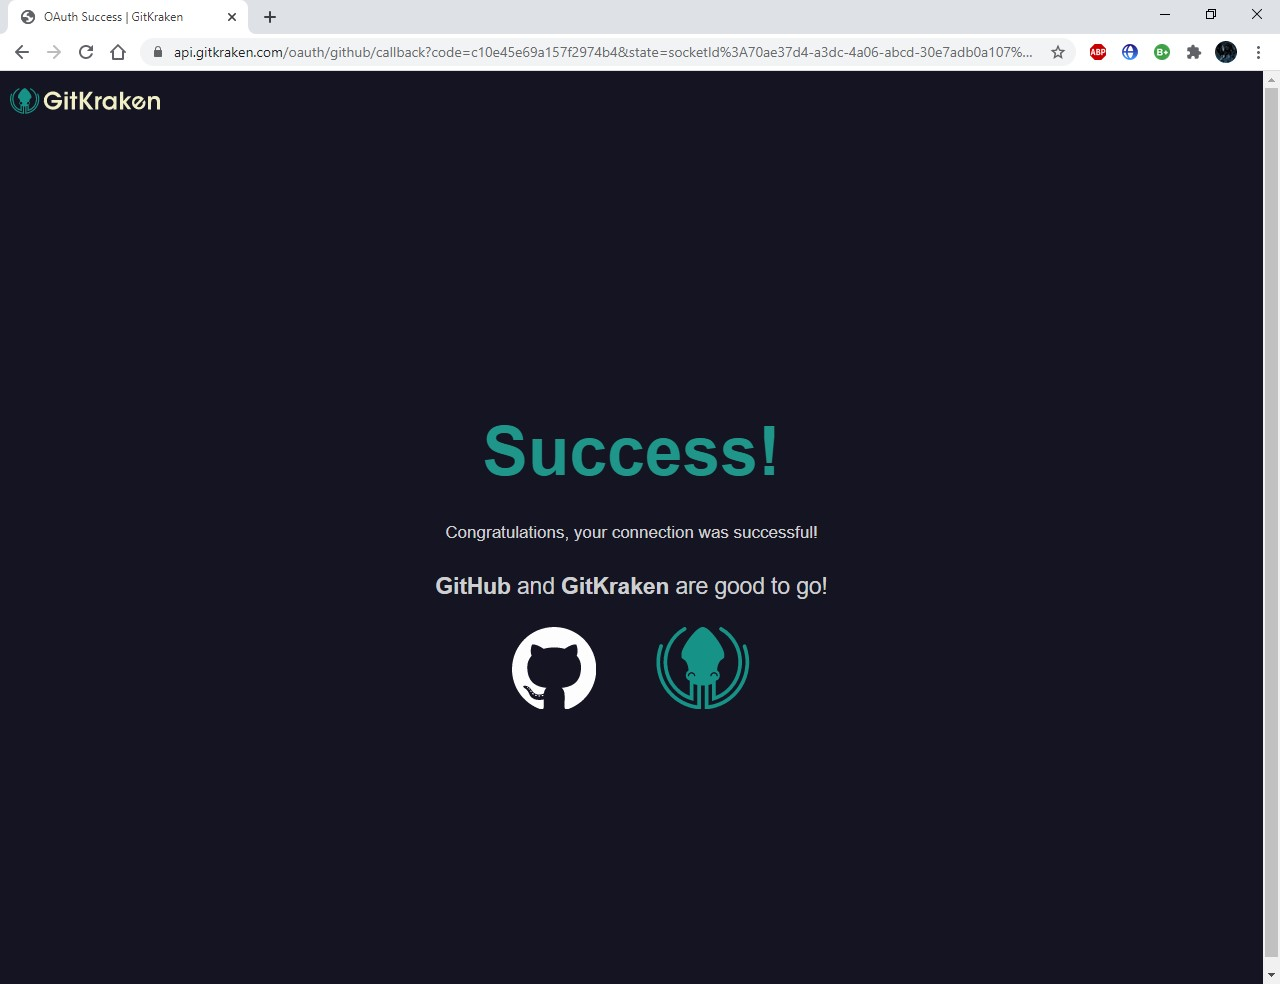
This will link your GitHub account to GitKraken.
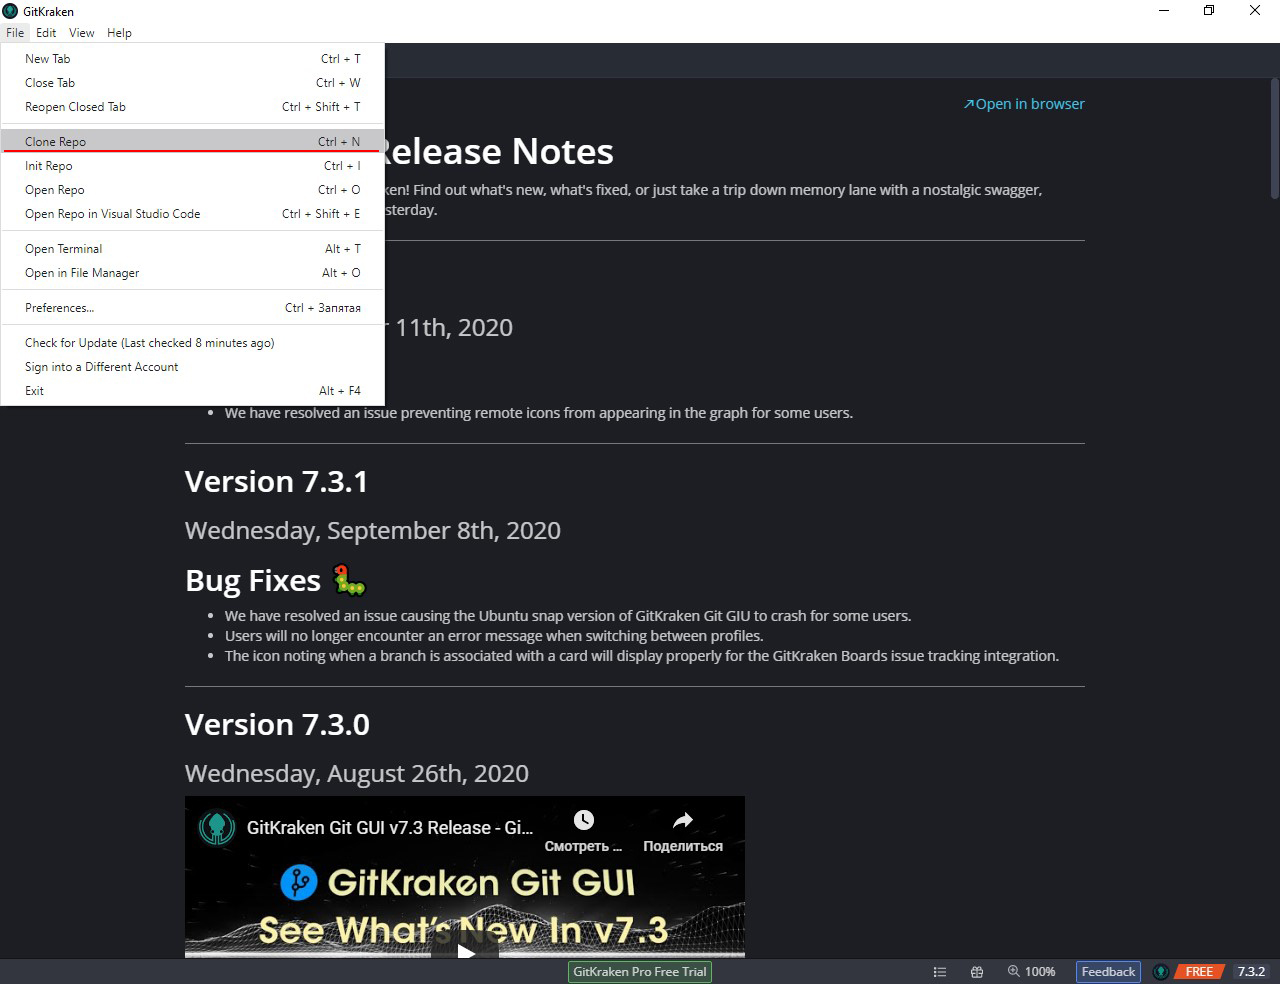
To work on a common project, you need to download it.
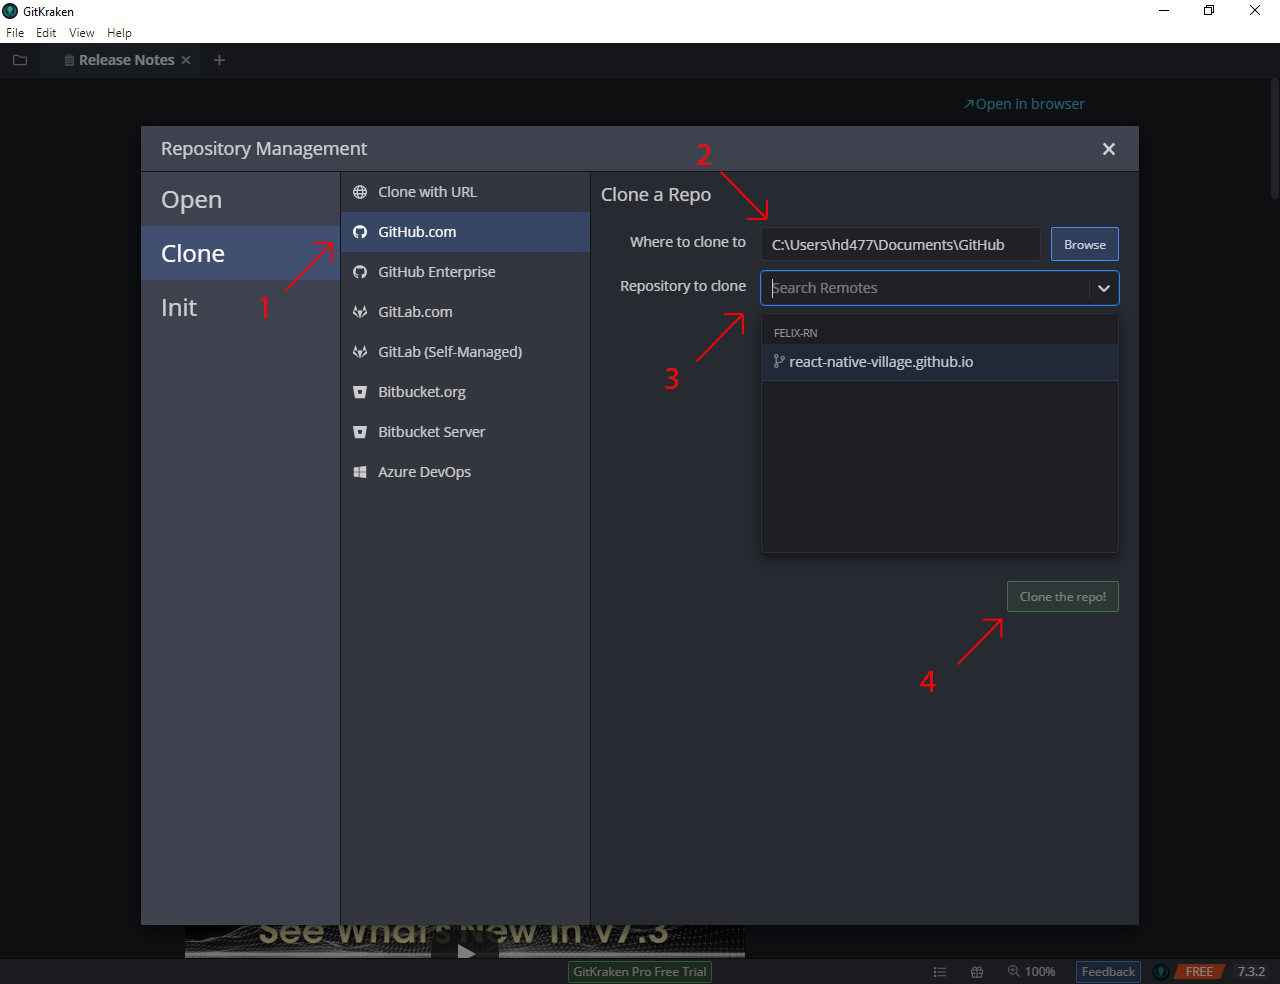
Press the key combination Ctrl + N, or select the item File-> Clone Repo in the main menu.
In the window that opens, select the section GitHub.com. In the field Where to clone to, select the path where the project will be located on your computer, and in the field Repository to clone, select the name of the project located on GitHub, which will be copied and press the button Clone the repo!
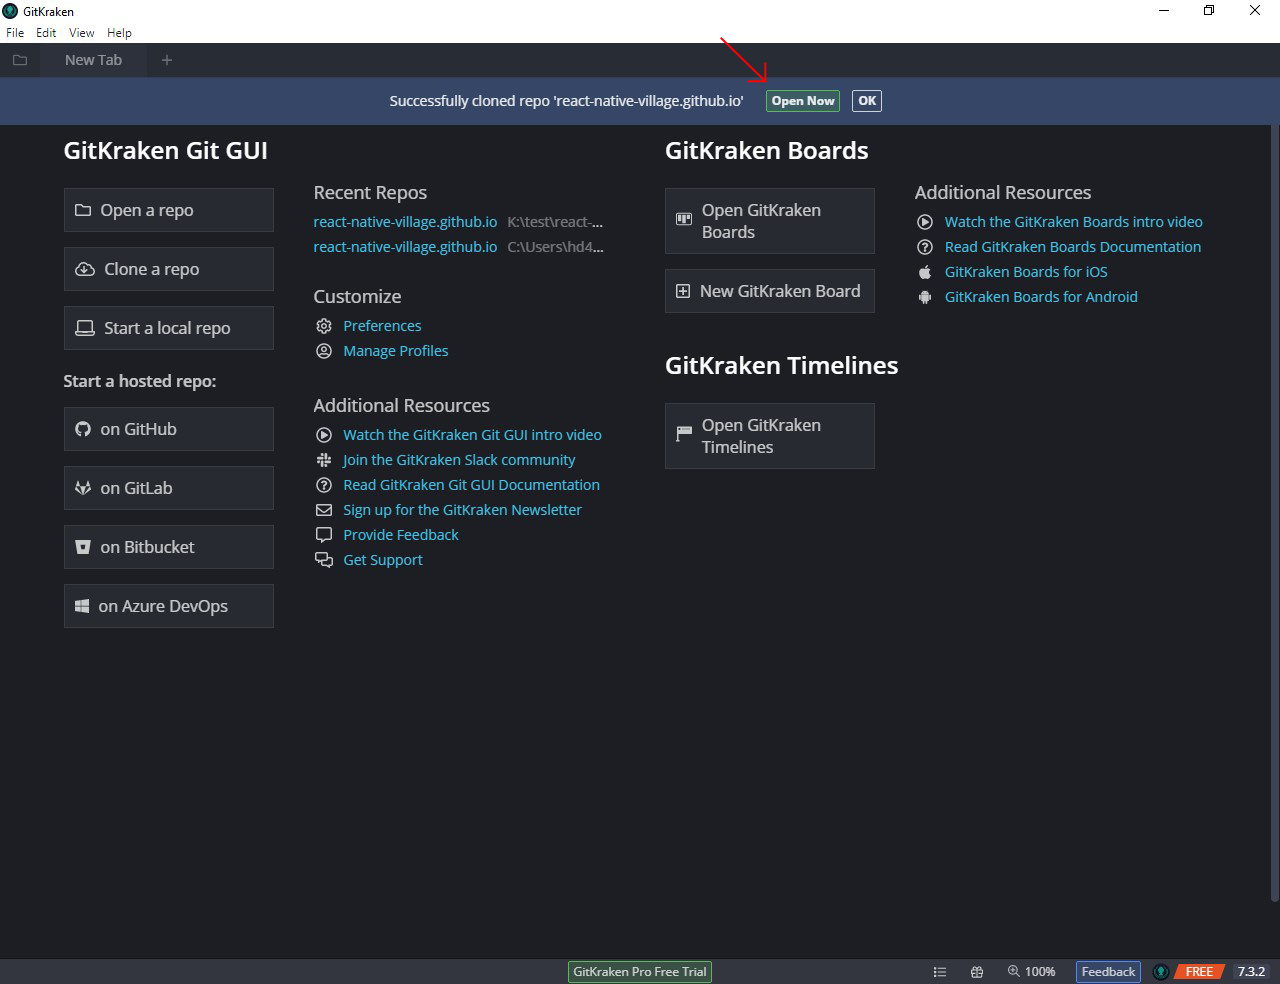
After the download of the project to your computer is complete, press the button Open Now - this will open the downloaded project.
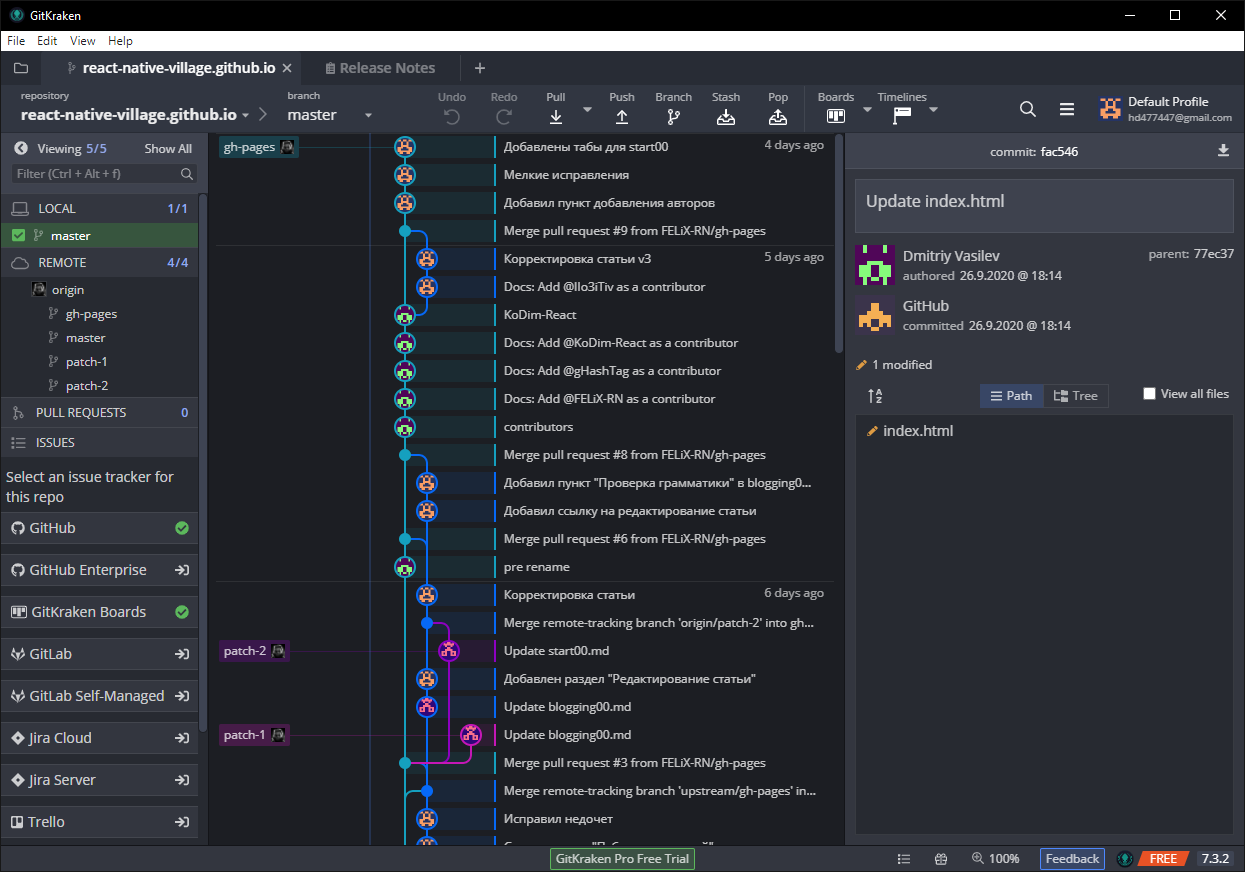
This is how the GitKraken interface looks when the project is open.

Connecting to a project branch
Now, to get started, you need to switch to the development branch - gh-pages.
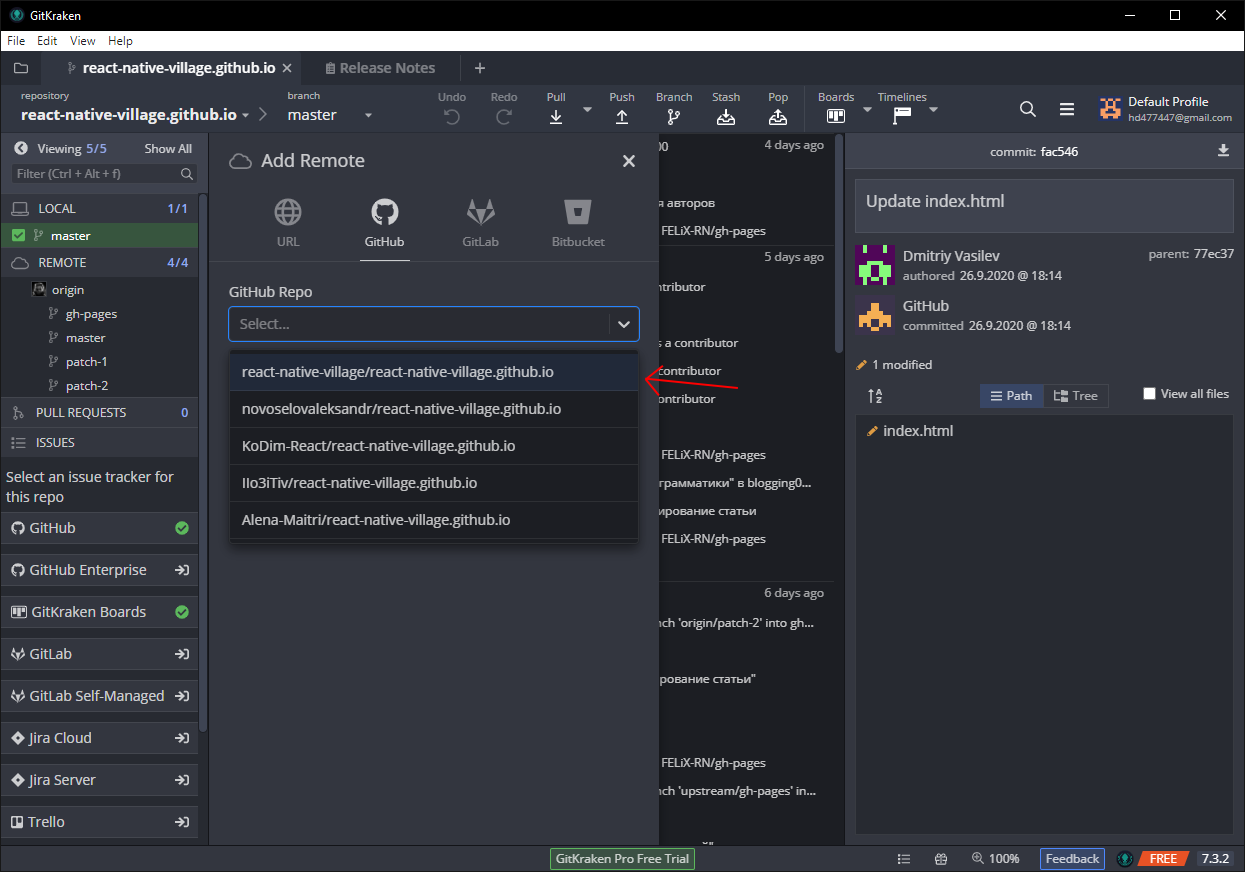
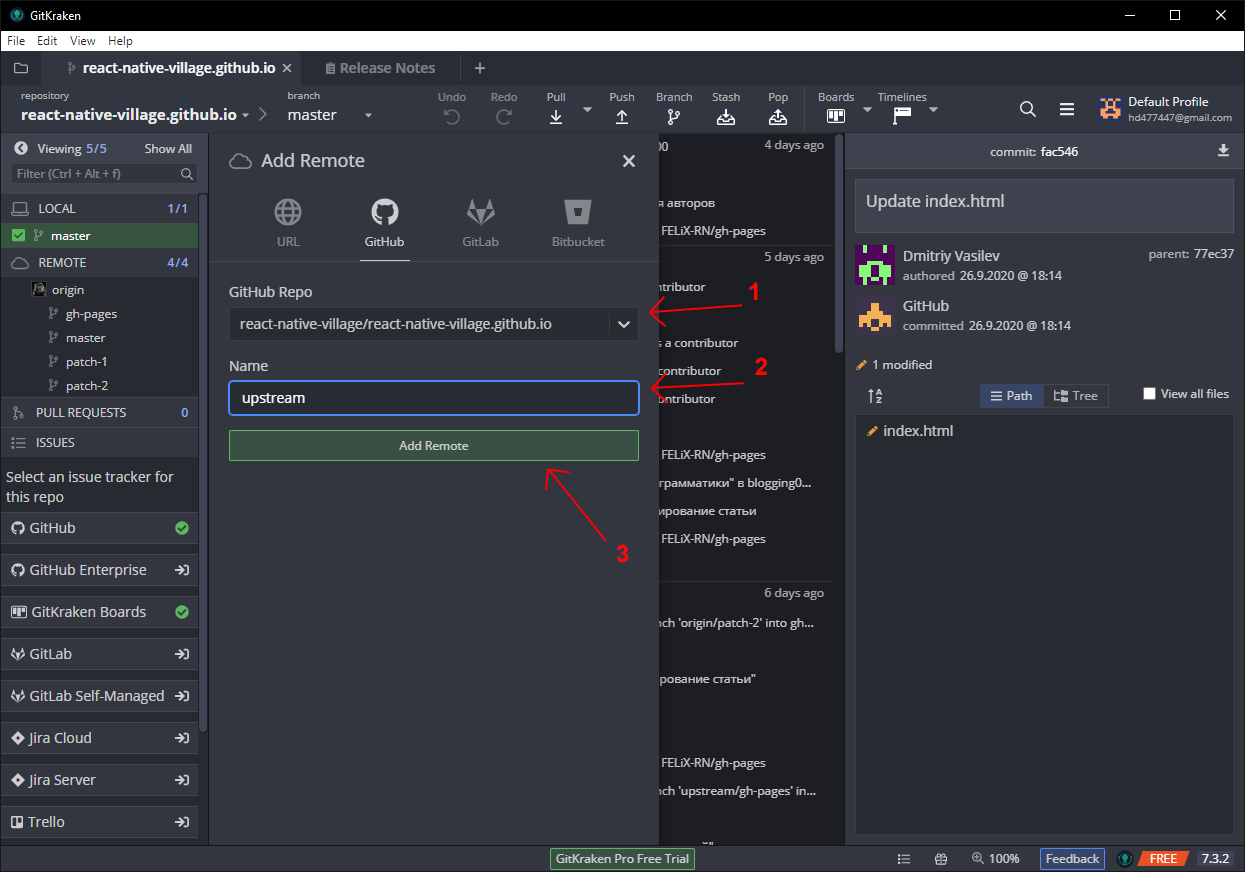
To do this, move the mouse over the REMOTE item and click the Add Remote button.
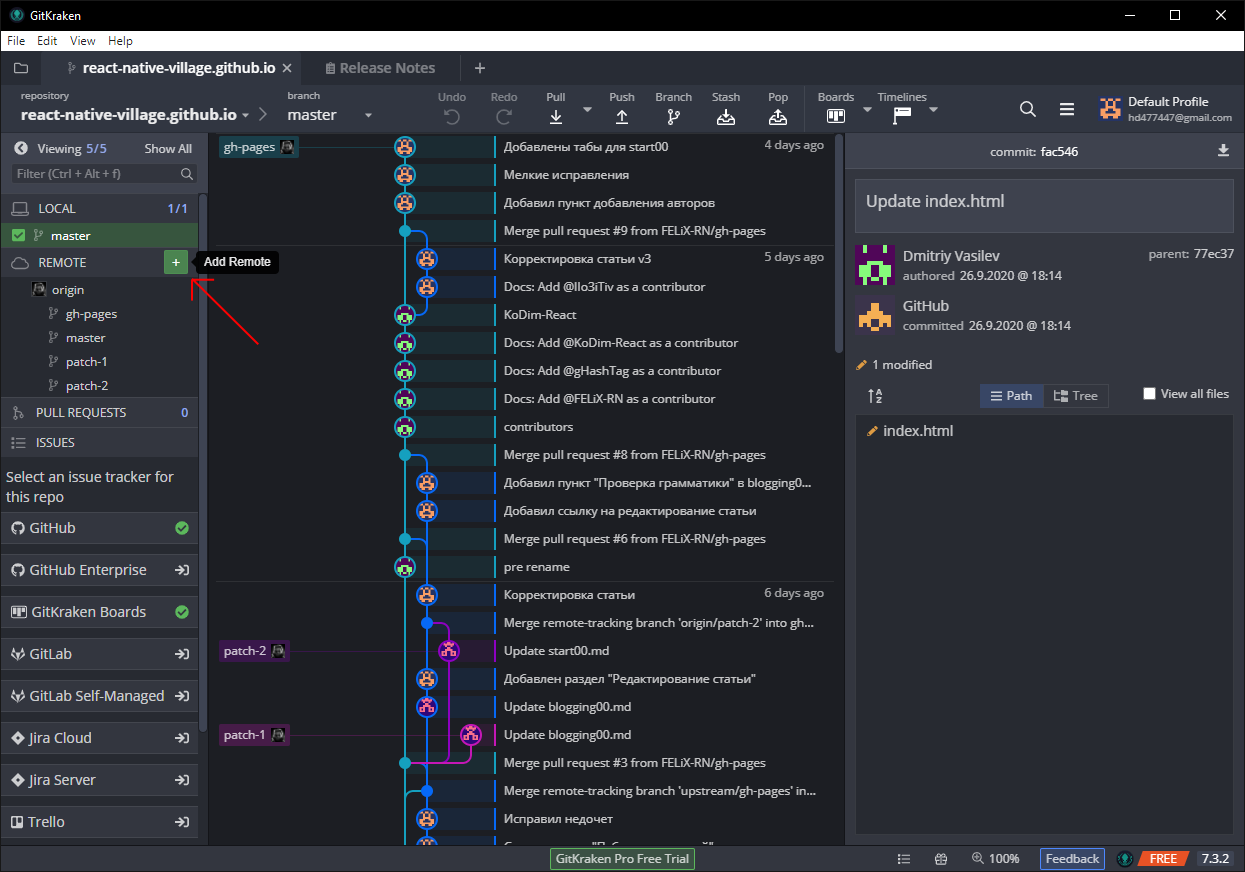
The Add Remote menu will open.
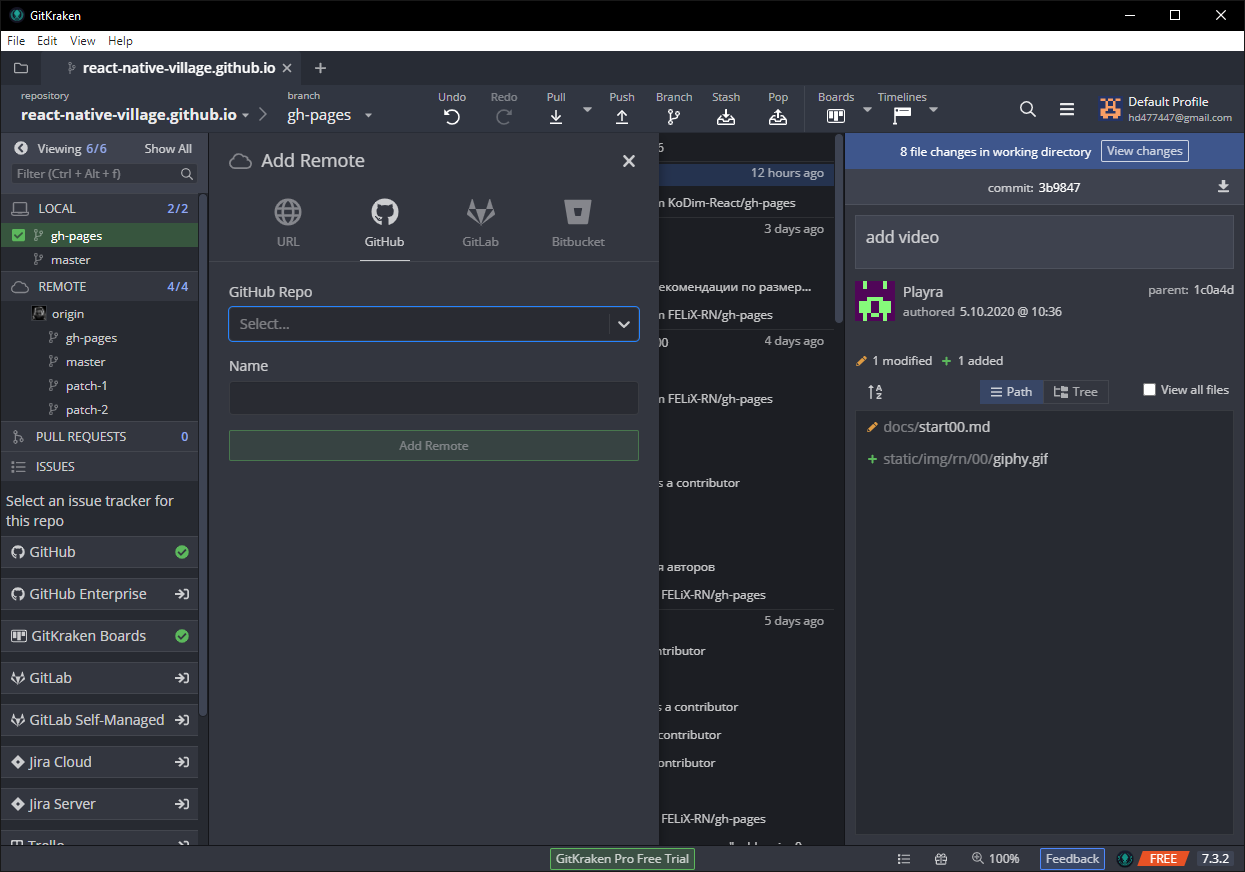
In the GitHub Repo field, select gHashTag/jscamp, and in the Name field, enter any name for this repository.
Click the button Add Remote.
The repository download process begins.
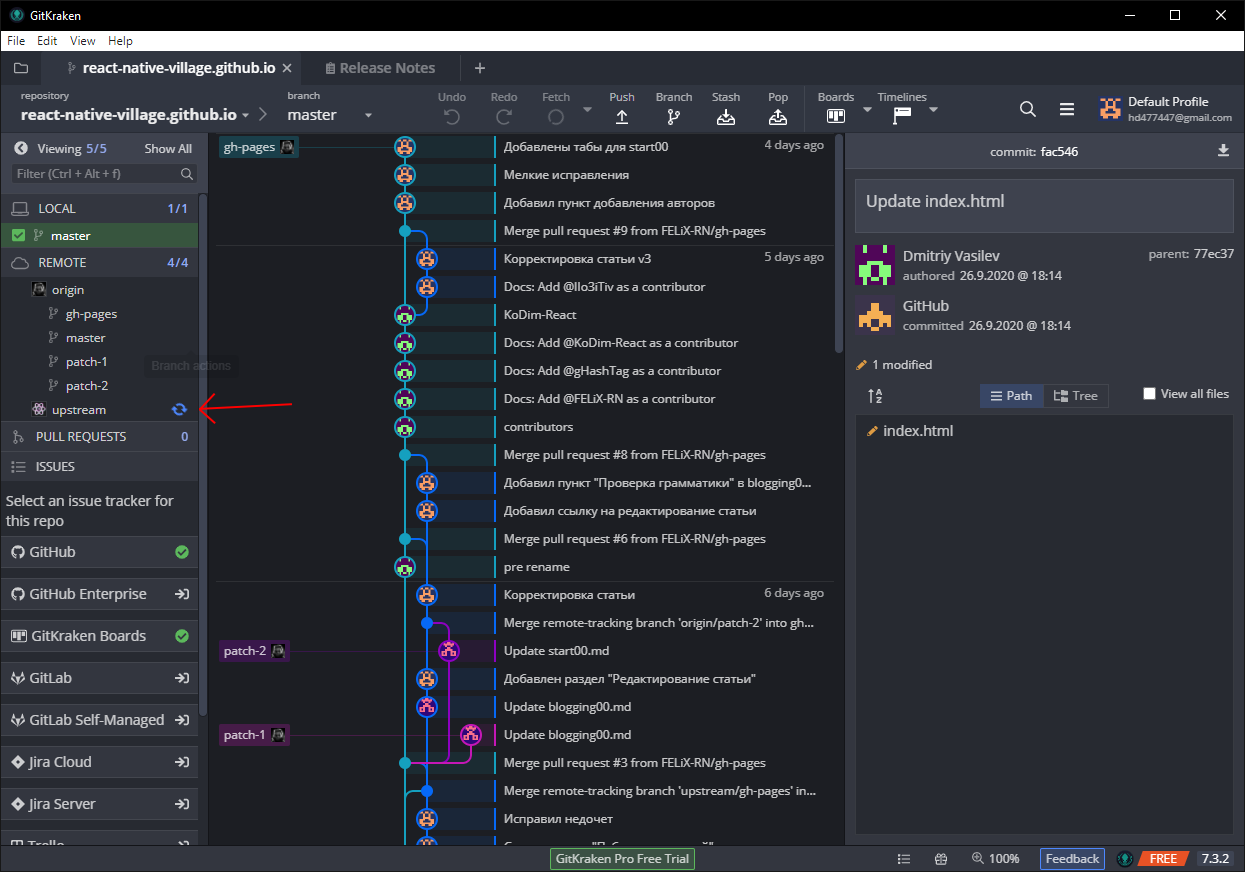
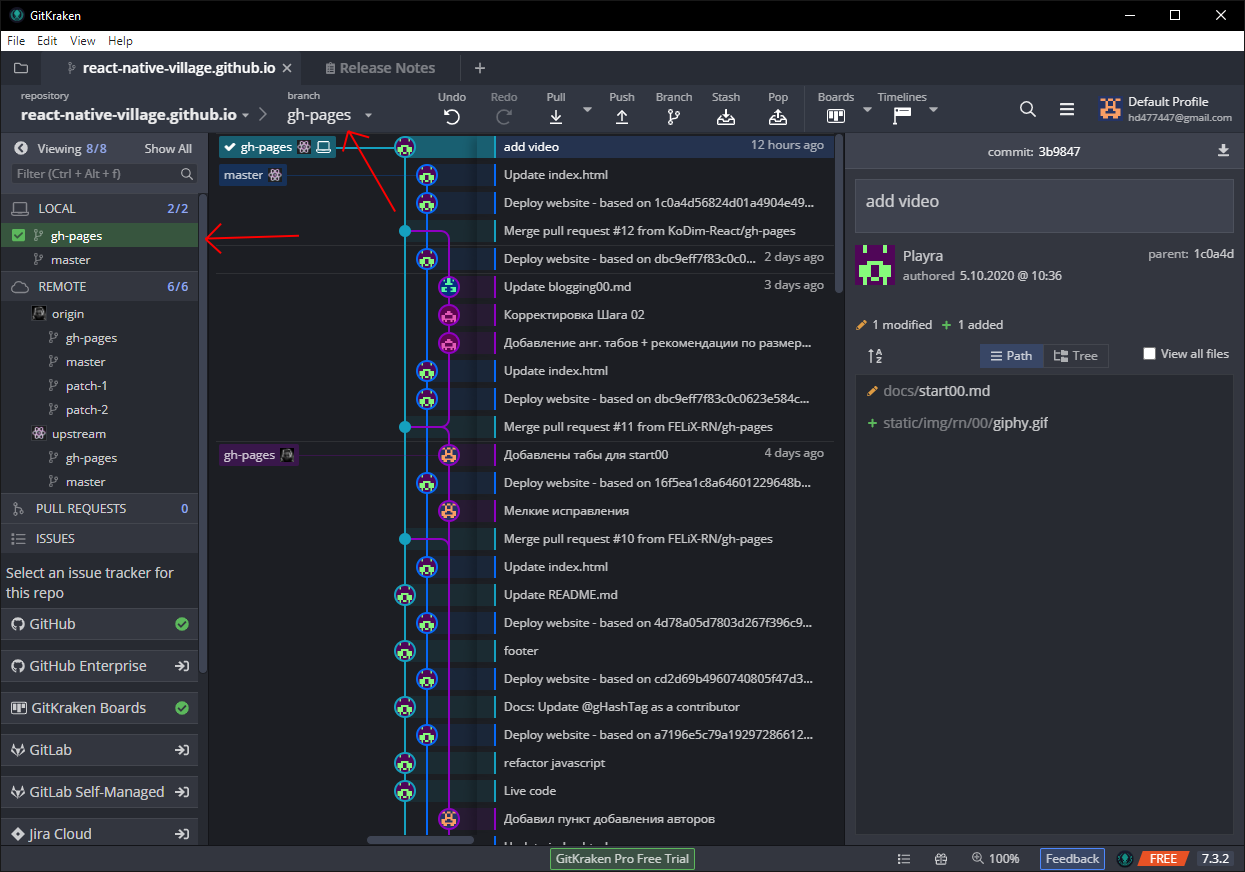
After the download is finished, you need to switch to the gh-pages branch. To do this, double-click on the branch of the main repository gh-pages.
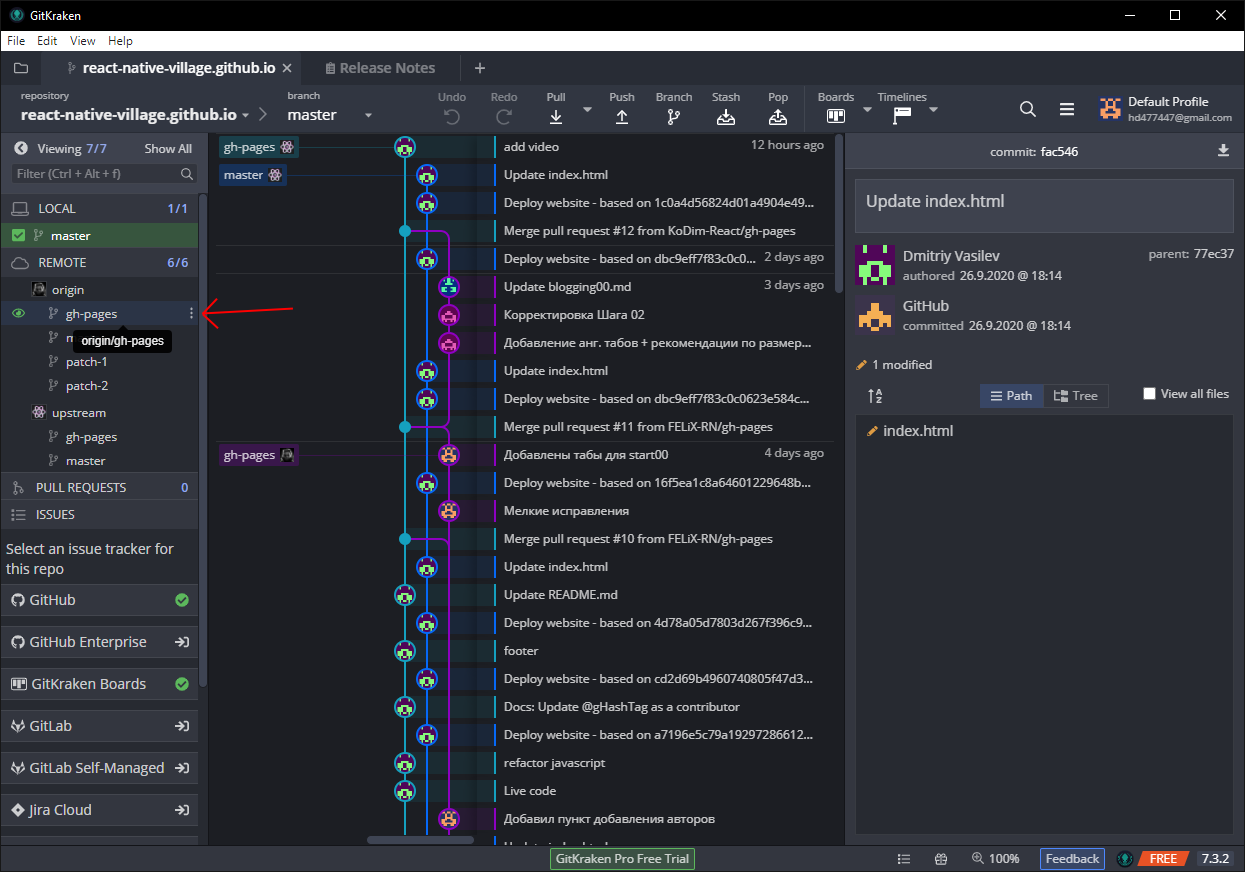
This will switch you to the gh-pages development branch.

Подготовка к работе с кодом
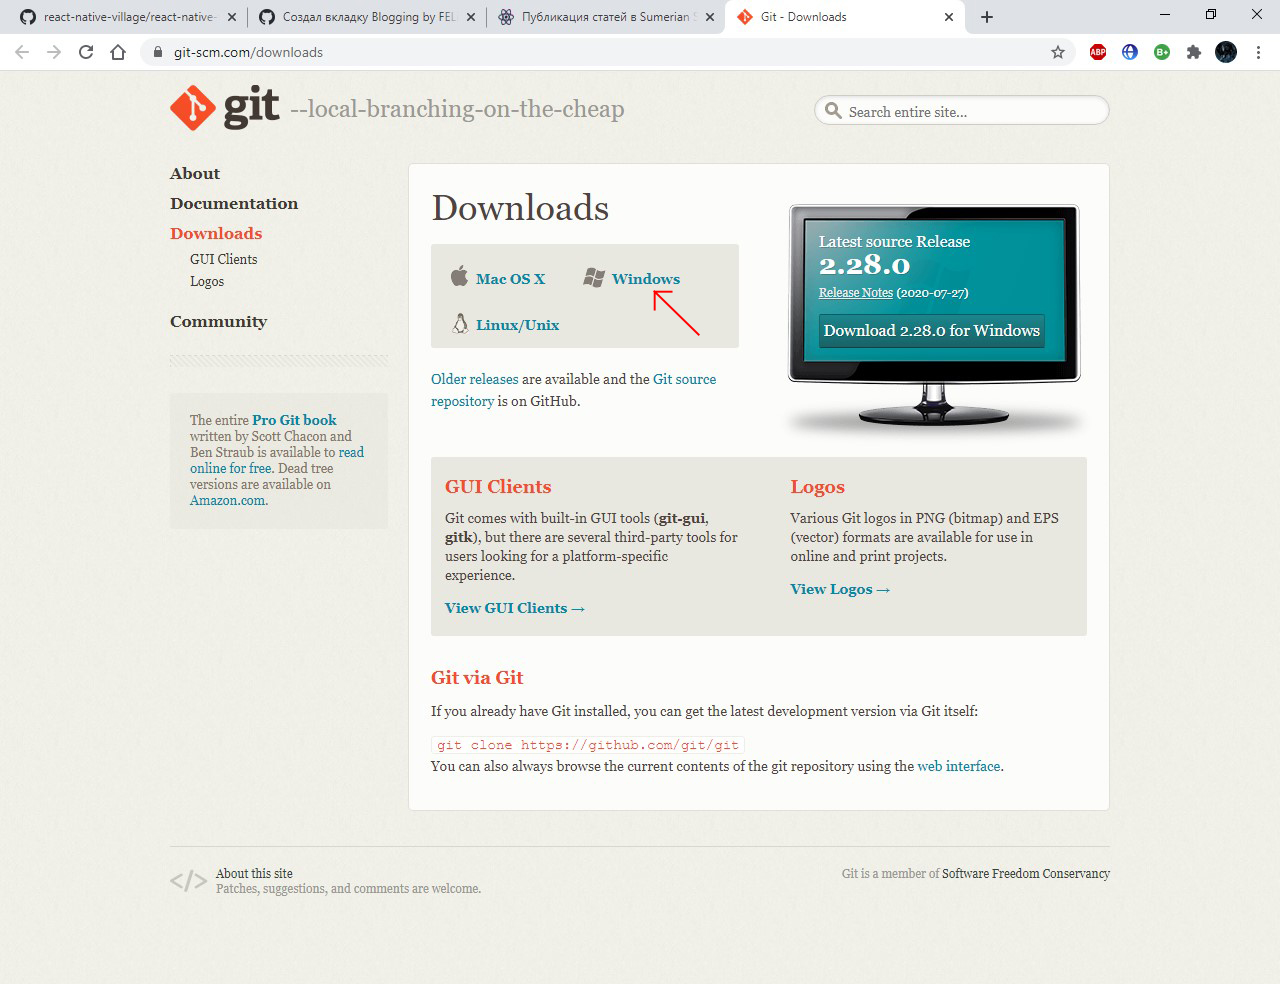
Make sure you have some code editor installed on your computer (we recommend VS Code). Download and install the package Git. It is a program for controlling the versions of compiled programs.
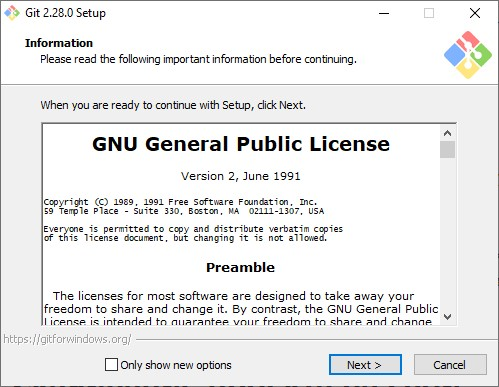
After starting the installer will greet you with the start window, press the button Next.
At this step of the installer, we leave everything as standard.
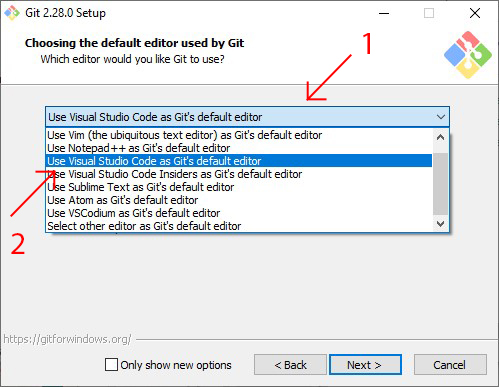
Next, the installer will offer you to choose the default code editor, we recommend choosing Visual Studio Code.
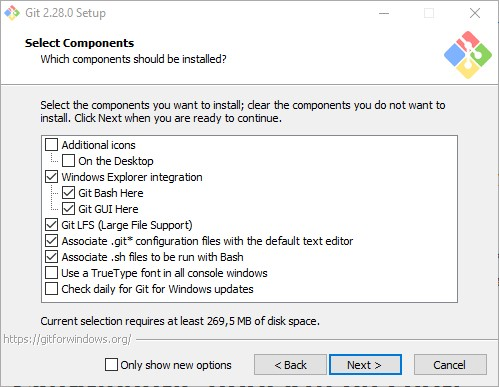
During further installation, click Next, leaving all the checkboxes by default (only if you do not know what they mean).

Installing packages
For further actions, you need an installed package manager Chocolatey. Install the packages node.js and yarn using it.
To start the installation process, run the following commands in PowerShell:
choco install -y nodejs.install
и
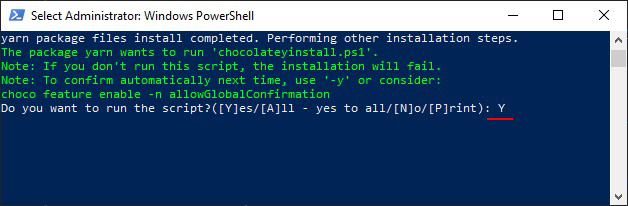
choco install yarn
When installing yarn, confirm your choice with the letter Y.
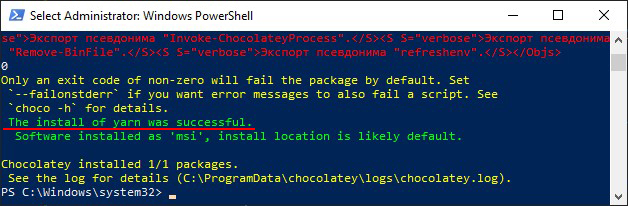
After the download and installation of the packages is complete, a success message appears.
We have prepared our computer for creating and editing articles.

Creating an article
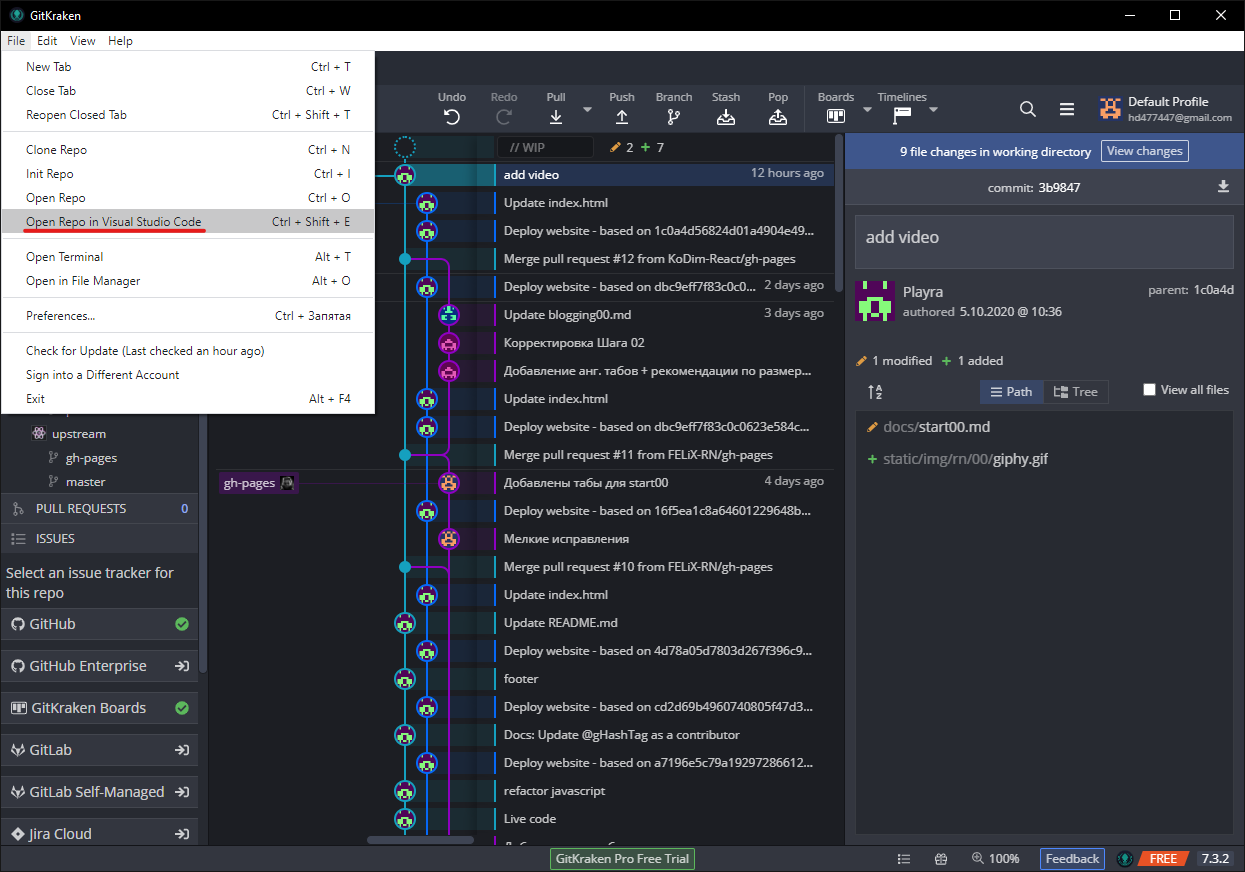
Open the project copied from GitHub in step Step 02. In the shell GitKraken select the menu item File-> Open Repo in ... or open the folder with the project manually.
::: info
With the editor Visual Studio Code installed, select the menu item File -> Open Repo in Visual Studio Code.
:::
The project will start in the selected editor.
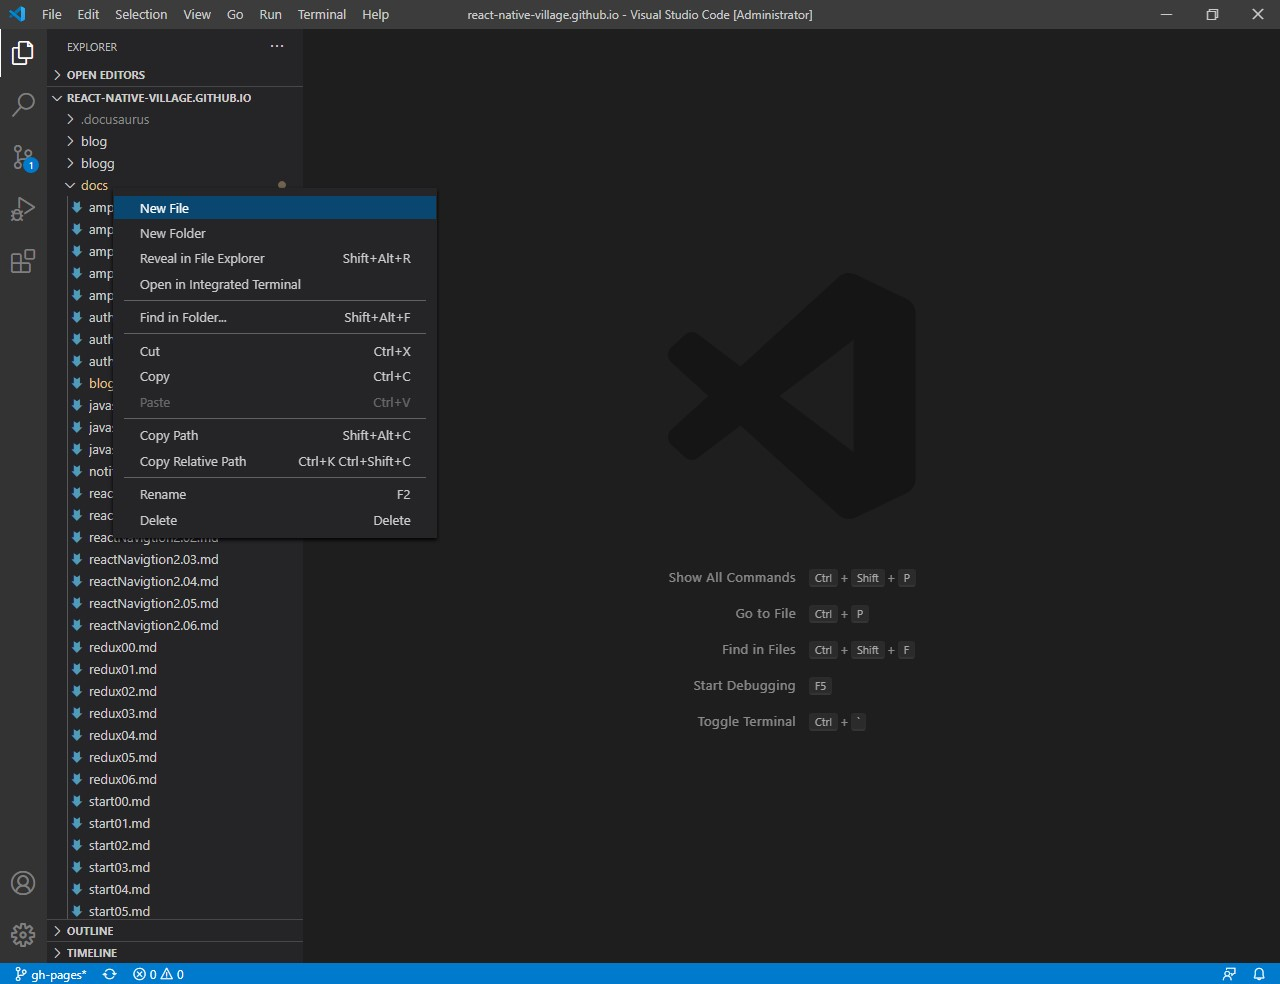
Next, go to the docs folder and create a new file in it. For example, blogging00.md
::: note
The files you create must have the extension *.md
:::
Now let's create a "header" for the created document. To do this, insert this code at the beginning of the document:
---
id: ...
title:  ...
sidebar_label: ...
---
In the id line, write the unique document code. The title line contains the title of the article. In the line sidebar_label indicate the name of your article, which will be displayed in the left side menu.
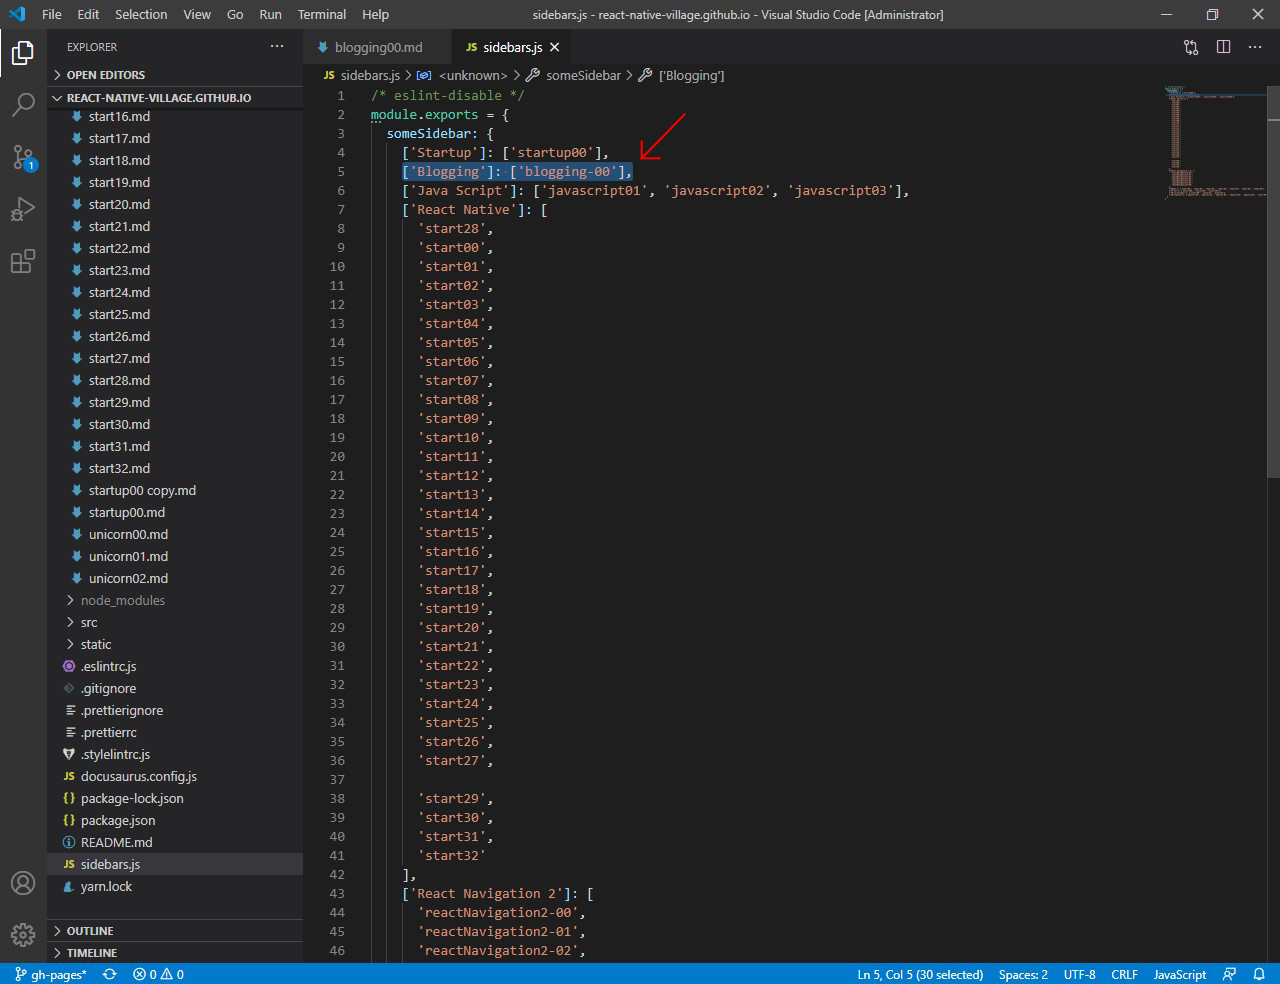
To add an article to the left side menu of the site, you need to add its name to the file sidebars.js.
To do this, open the file sidebars.js in the main directory and add a new line, for example:
['Blogging']: ['blogging-00'],
Where the first field is responsible for the name of the section in the left side menu, and the second parameter is the unique id of the article that you assigned earlier.
Now you can start typing.

GIF creation
To add gifs, follow the tutorial in this video.
Running a local server
To check changes in the text in the article in real time, we will organize the launch of a local server. To do this, open the PowerShell shell, go to the folder with the project with the command cd Full path to the folder and execute the second command:
yarn install
This command will install the quick article creation wrapper, Docasaurus. This shell is installed one time. Thanks to it, you can start the local server at any time with the command:
yarn start
The local server will run in the browser at Localhost: 3000.
An Internet browser window with your site will open automatically and you can view the article in real time.

Grammar check
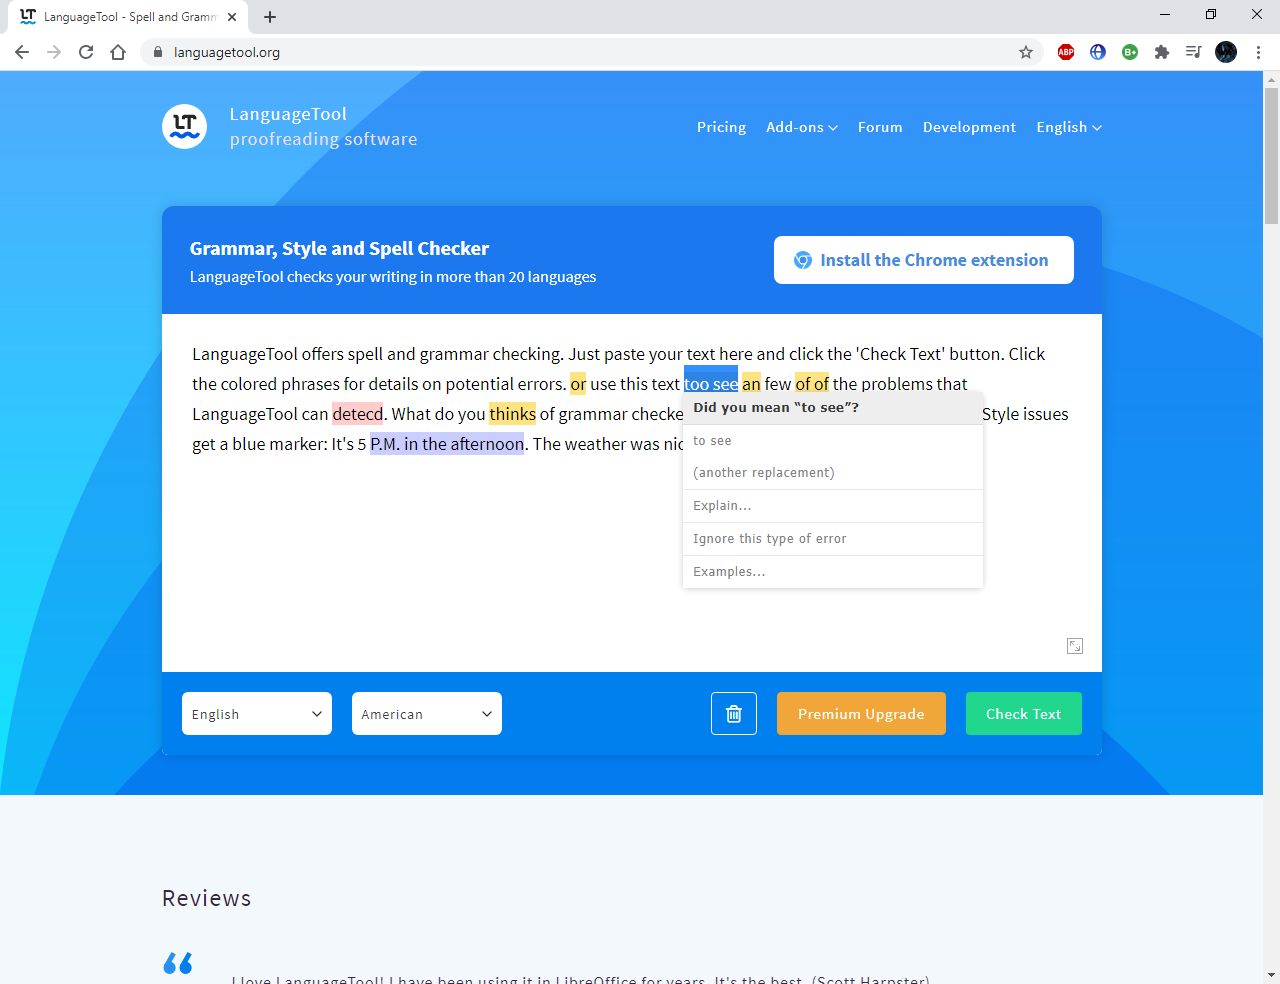
Before submitting an article, you need to make sure that the text does not contain grammatical errors. You can check your text on the website LanguageTool.
To check, copy the text of the article into the text field and press the button Check Text. Grammar errors in the text will be highlighted.
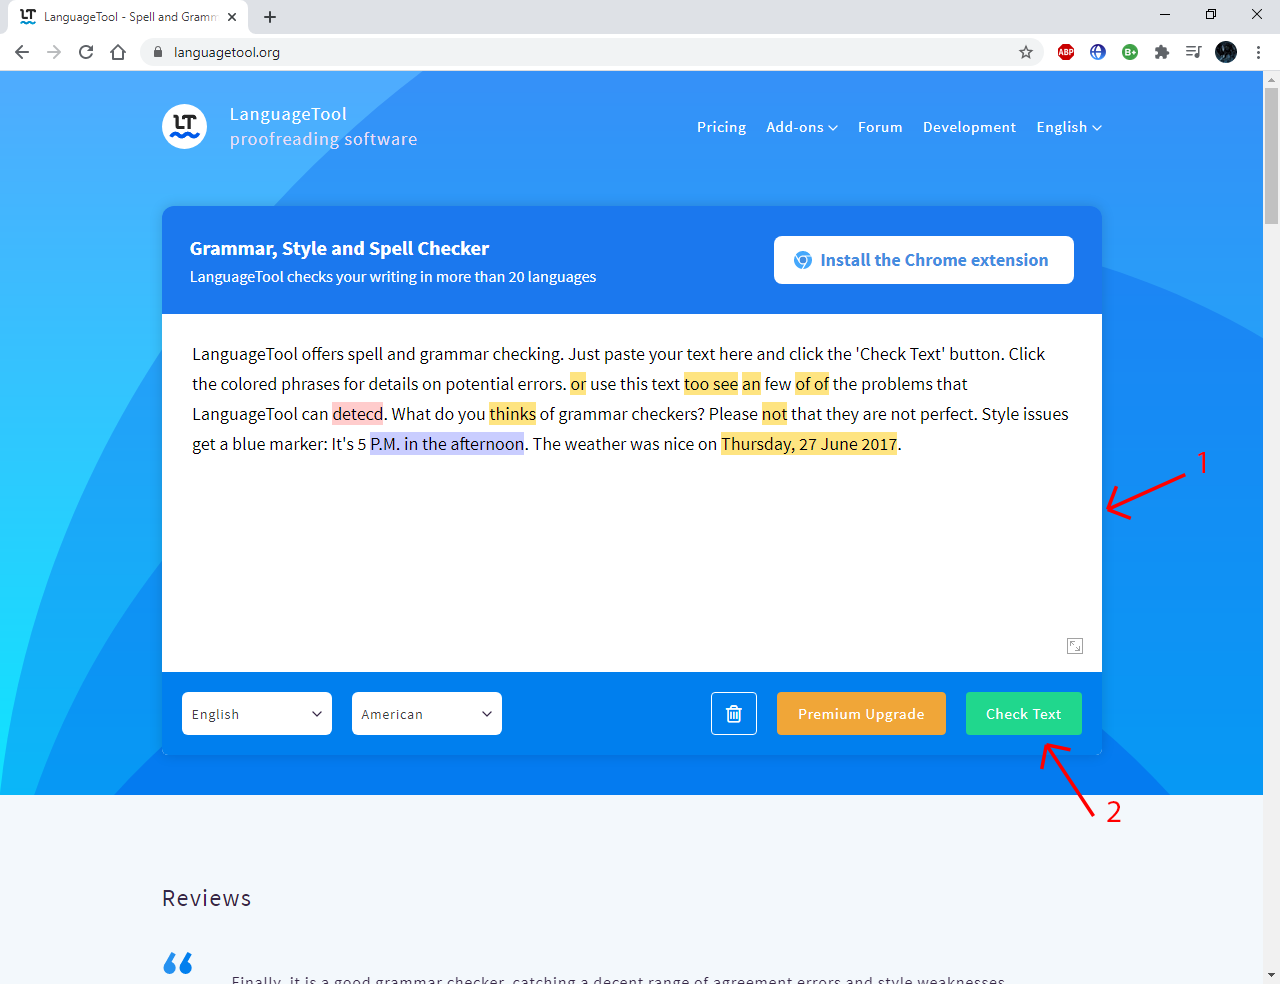
Now, by clicking on the highlighted word, you can correct the grammatical error.

Adding article authors and Patreon
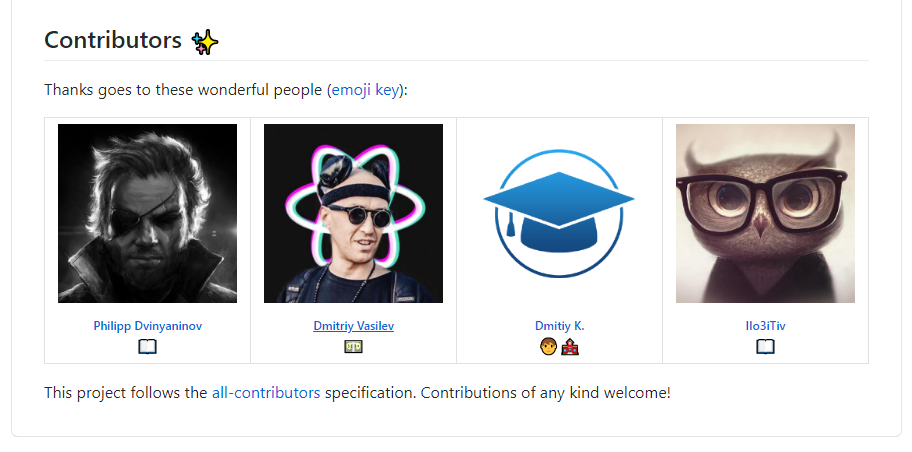
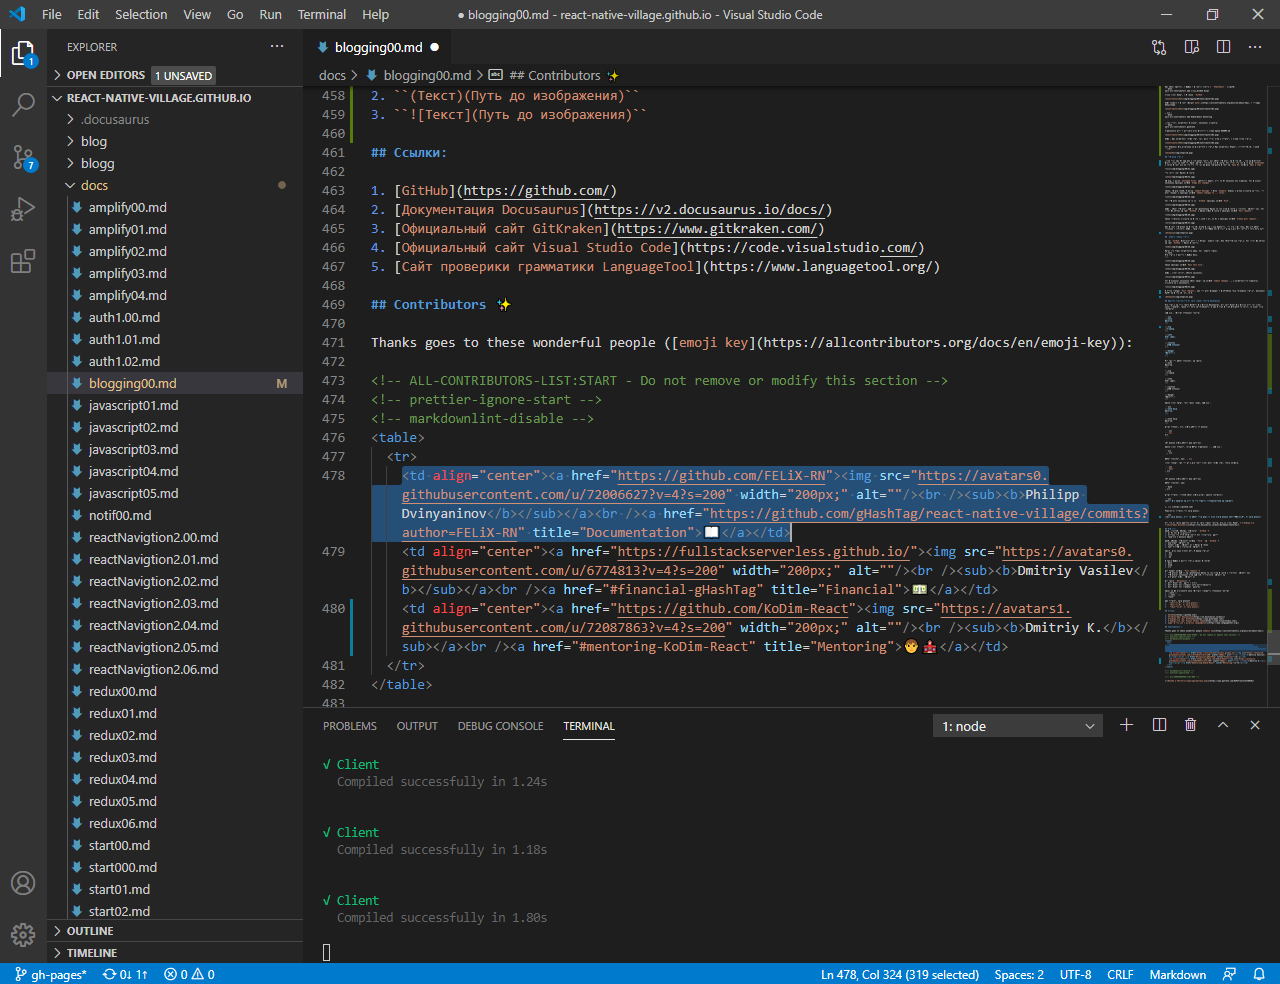
After completing the article and checking the grammar, you must mention all the people involved in the article, as shown in the picture below.
To add authors, open PowerShell or Terminal (on MacOS) using the command cd Full path of the project folder go to the folder of the previously downloaded project. Then enter this command:
yarn add --dev all-contributors-cli
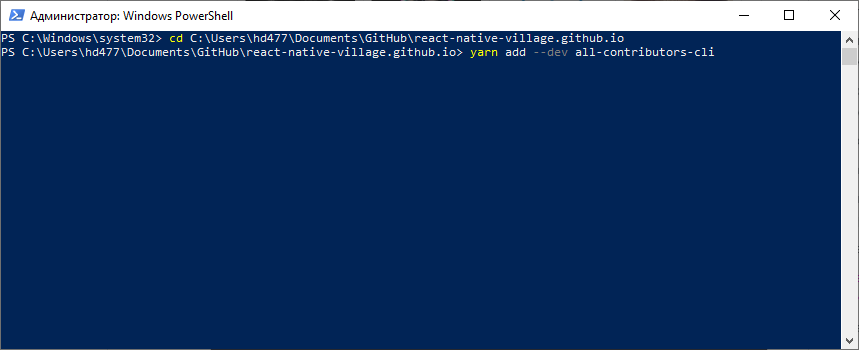
The process of downloading and installing the all-contributors package will begin. This package is installed once. Thanks to this package, you can add people involved in the project and their contributions. To do this, while in the project folder, enter the command in PowerShell:
yarn all-contributors add Логин_GitHub Вклад
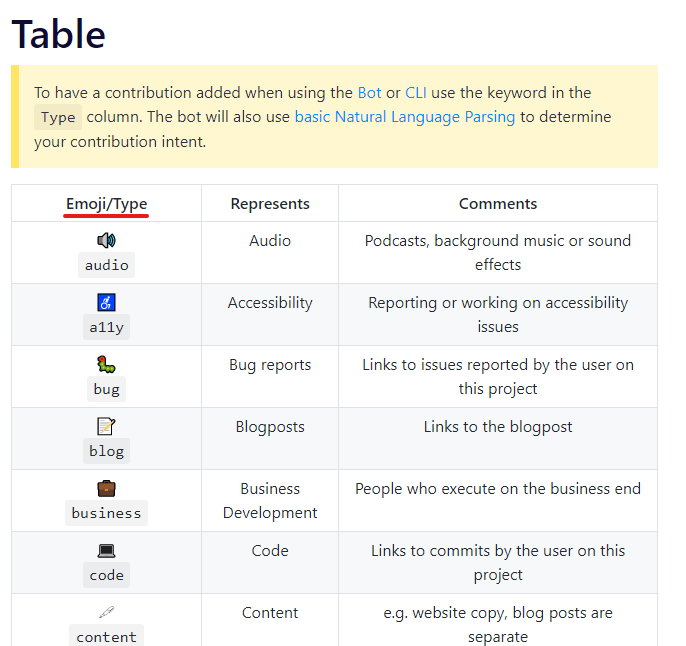
The types of contributions to the project are described here, in column Emoji/Type.
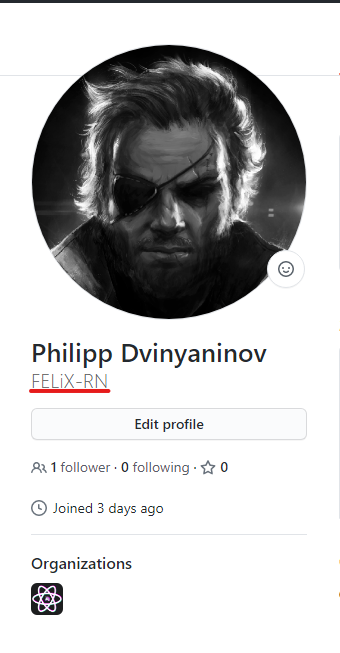
Login can be found in the profile GitHub
Example:
yarn all-contributors add KoDim-React mentoring
After that, you need to apply the changes with the command:
yarn all-contributors generate
Added authors will automatically appear at the end of the file README.md
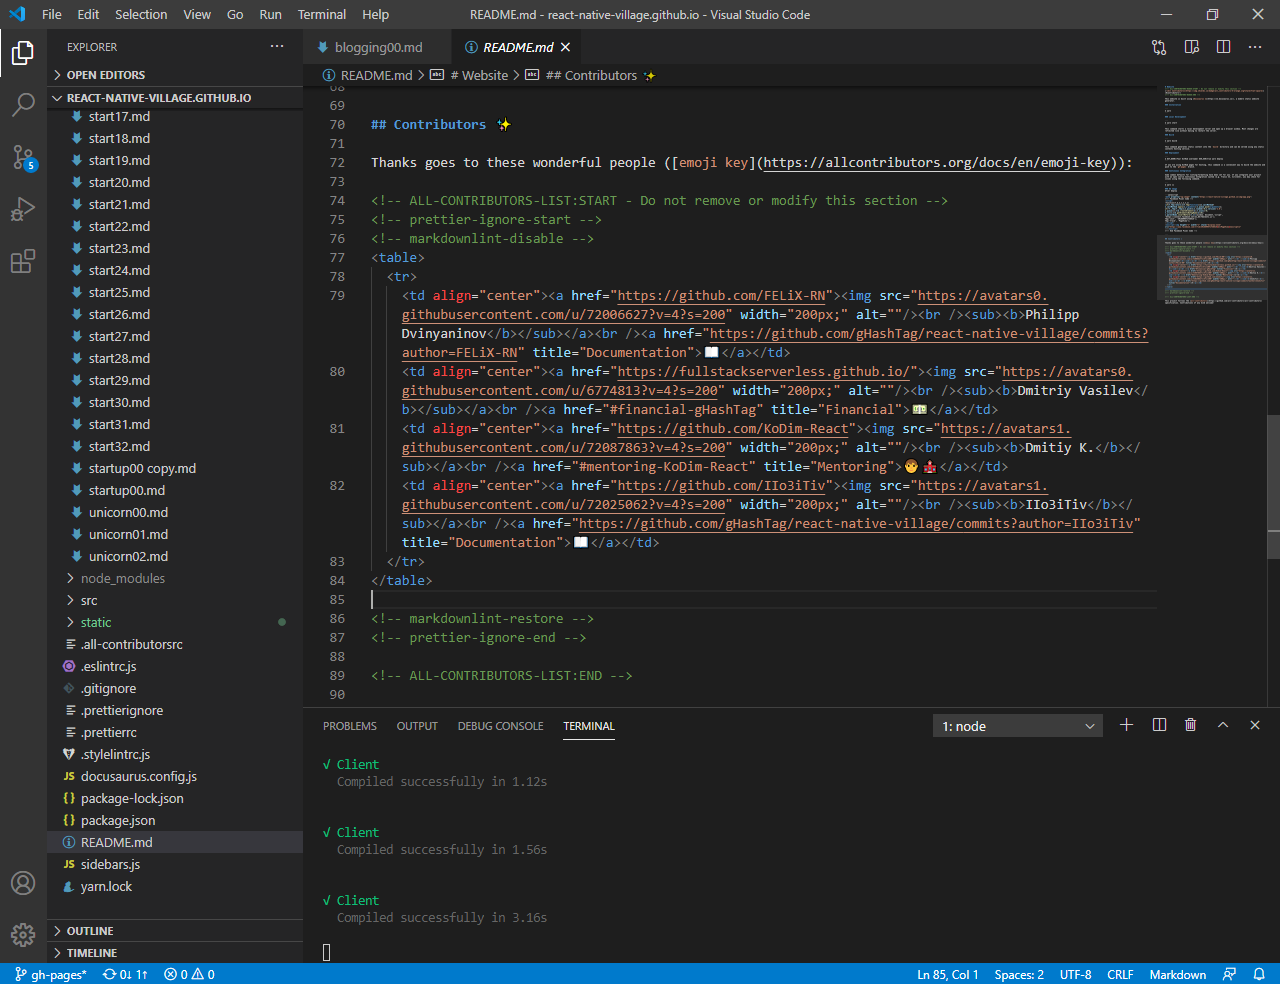
Now you need to copy the entire block of this code and paste it at the end of your article.
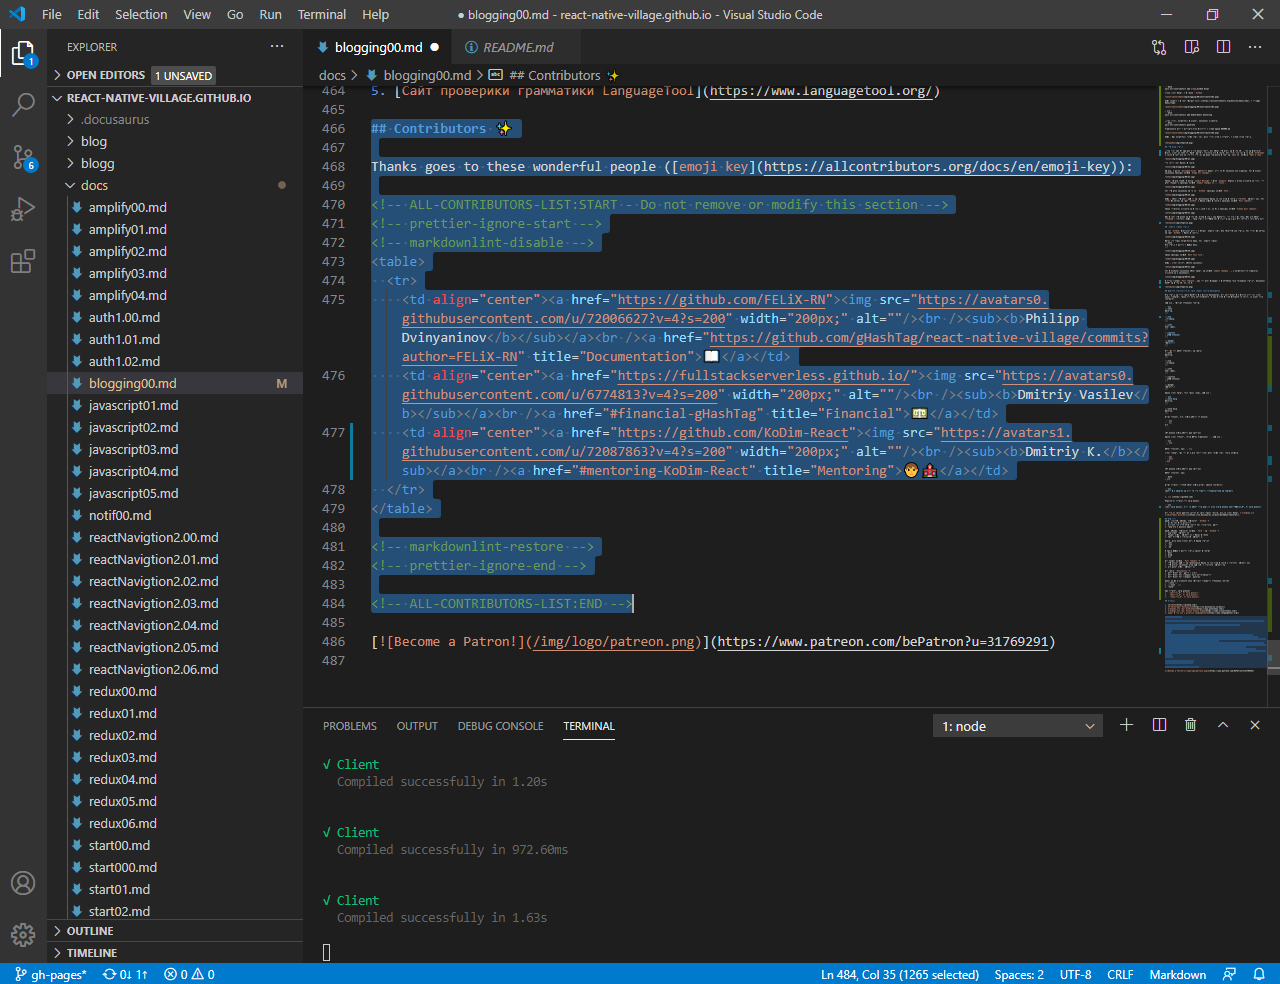
Thus, you will copy to your project all users recorded in README.md
To delete users not involved in the article, you need to delete the corresponding cell <td>.
It remains to add a link at the end of the article to Patreon:
[](https://link-to.app/xvh7Ush9kl)
The article is ready to be sent!

Submitting an article
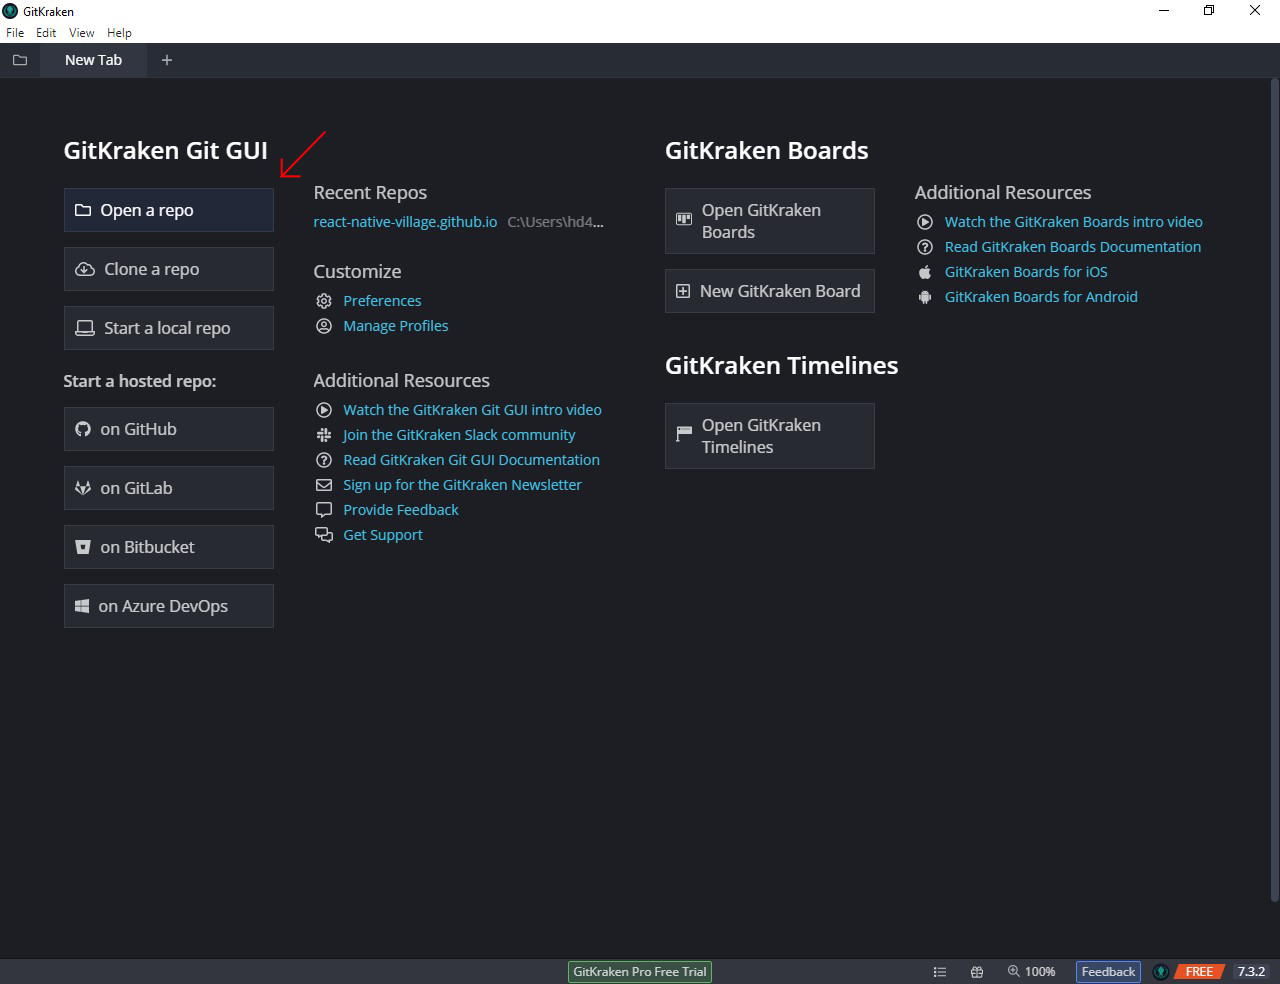
After you have typed and saved the text, you need to send it for review. The check allows you to understand whether it is possible to embed your work into the main project code. To do this, open the program GitKraken and (if the project is not open yet) open the previously downloaded project at Step 02 with the button Open a repo.
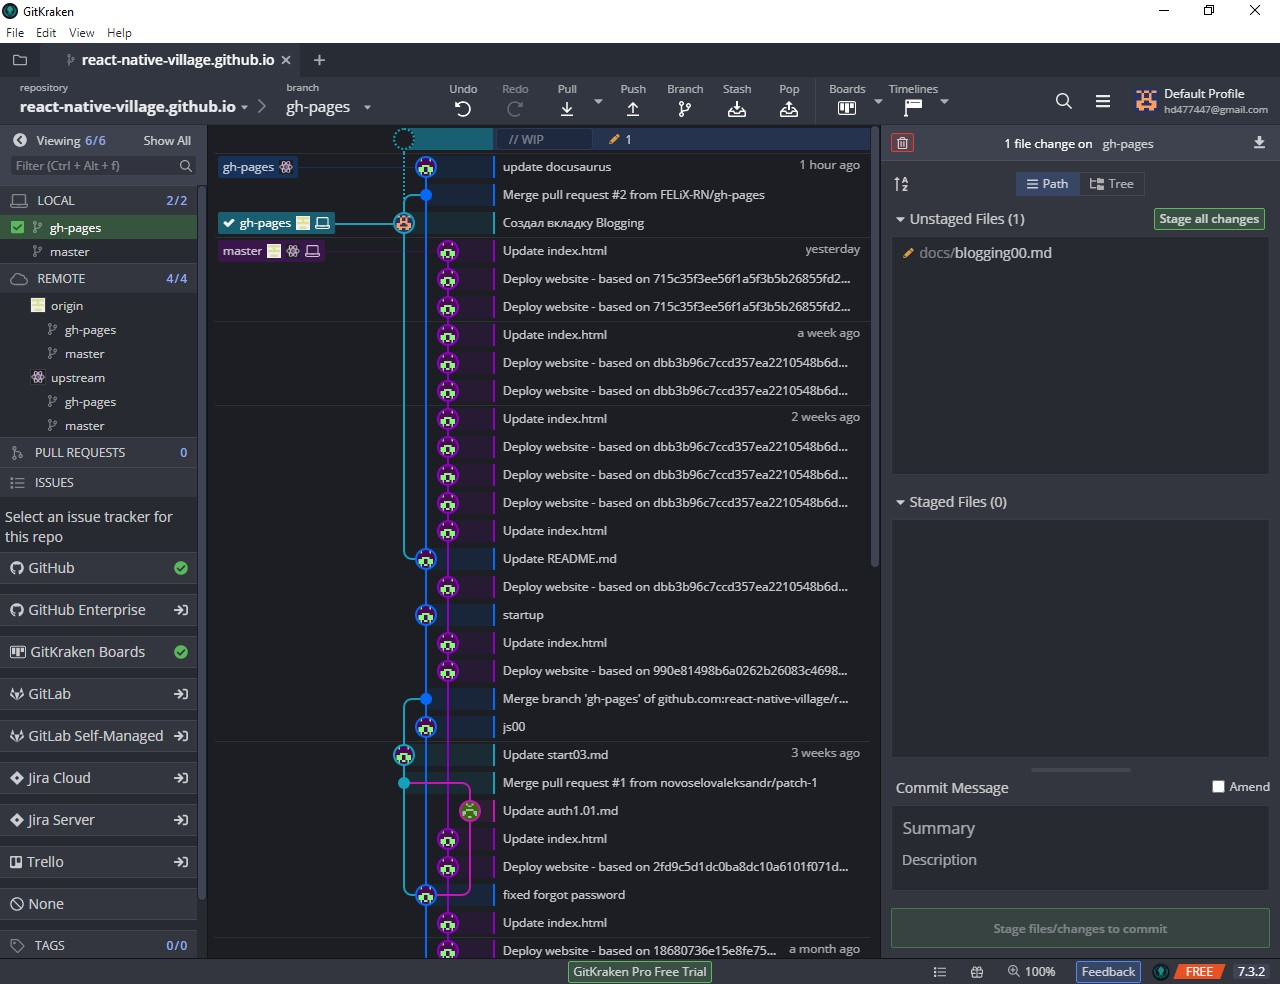
Your project window will open.
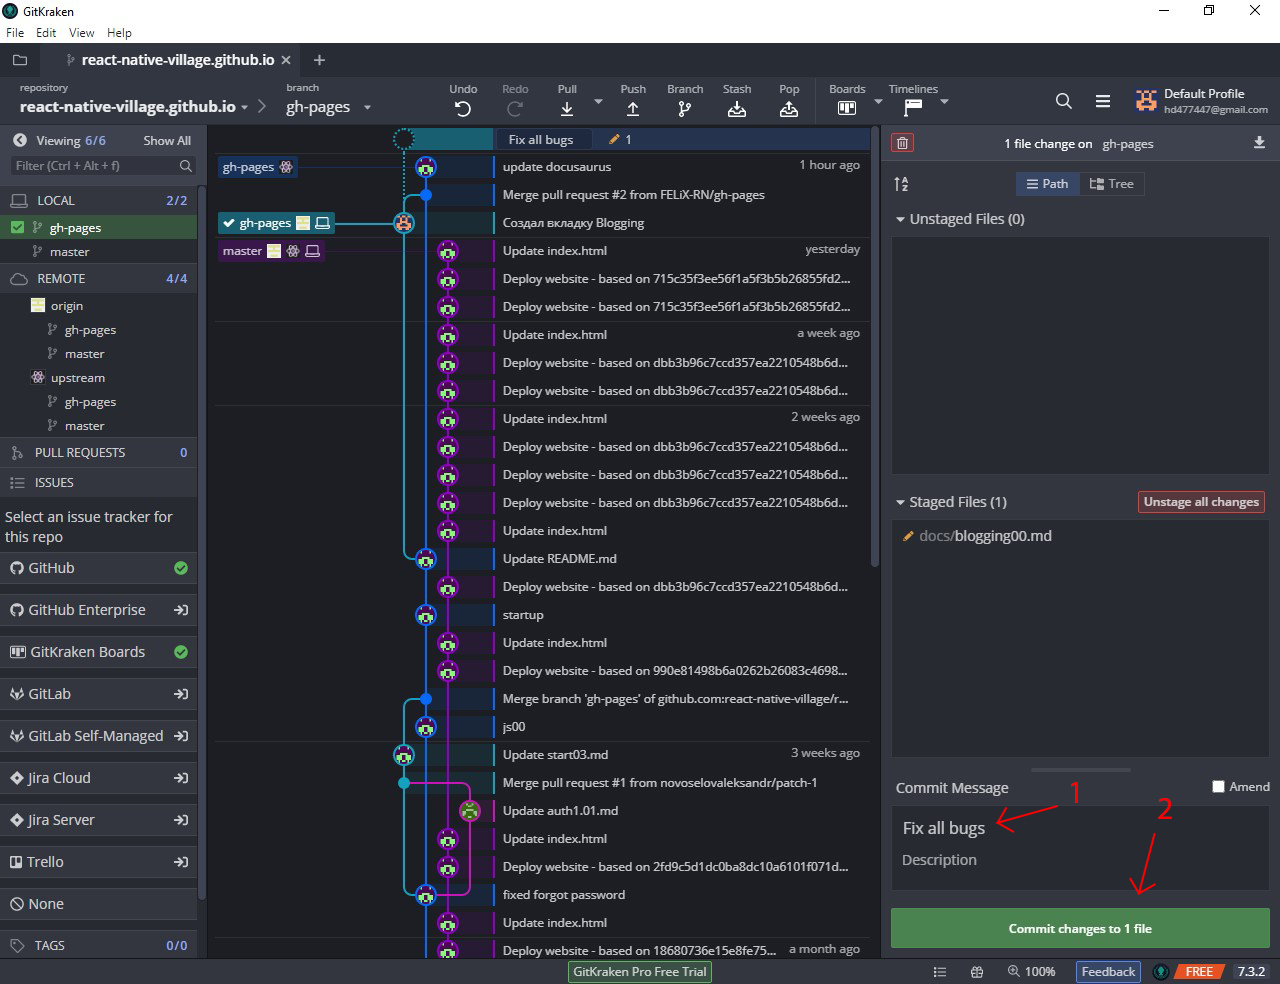
On the right, in the Unstaged Files block, there are files that you have changed or added. To apply the changes, press the button Stage all changes.
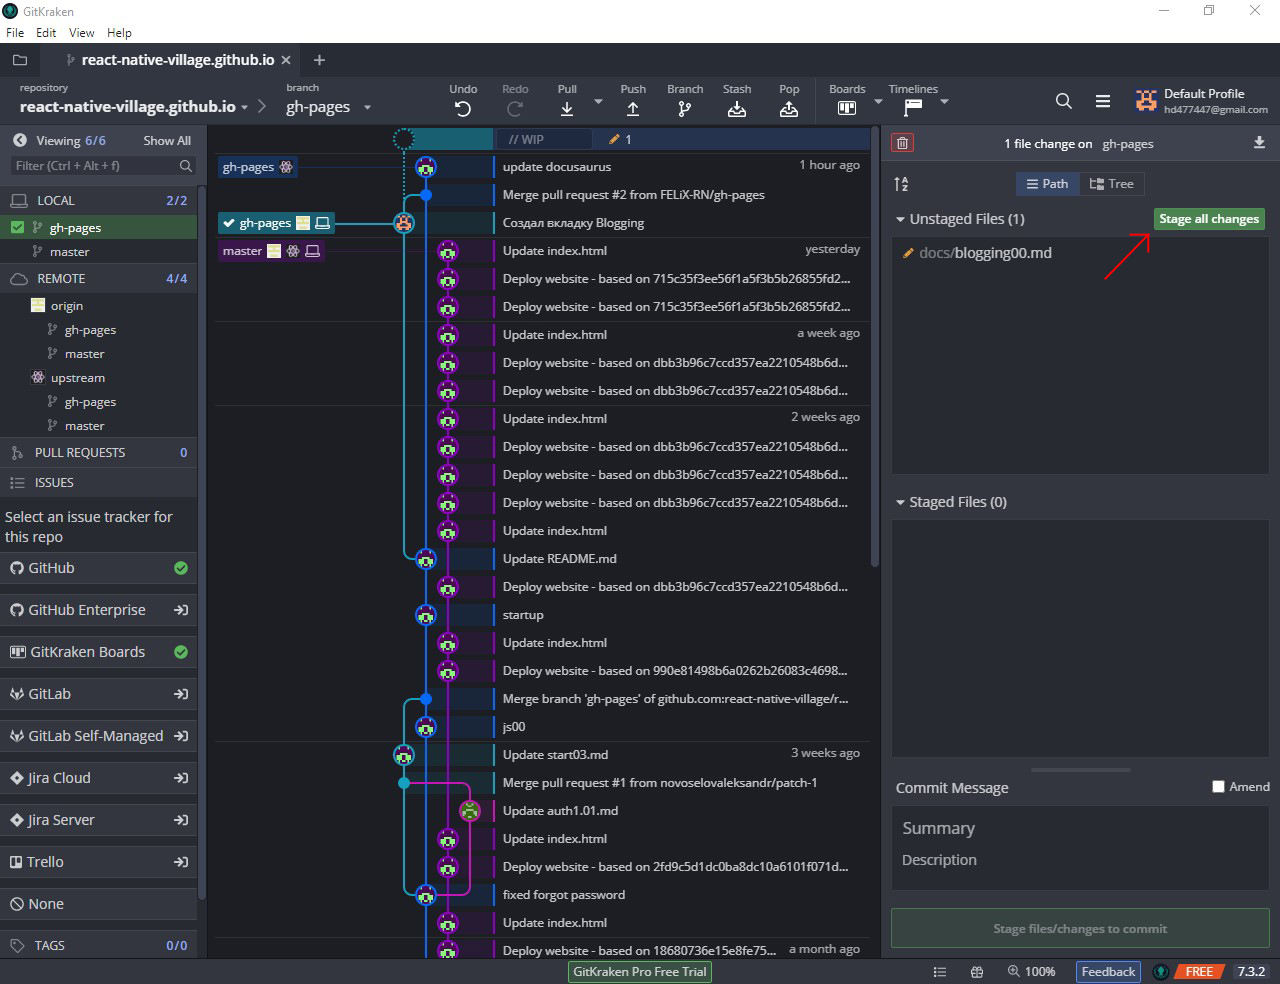
Further, at the bottom right, at the Commit Message block in the Summary field we indicate a brief commentary on what has been done and press the button Commit changes to ... files.
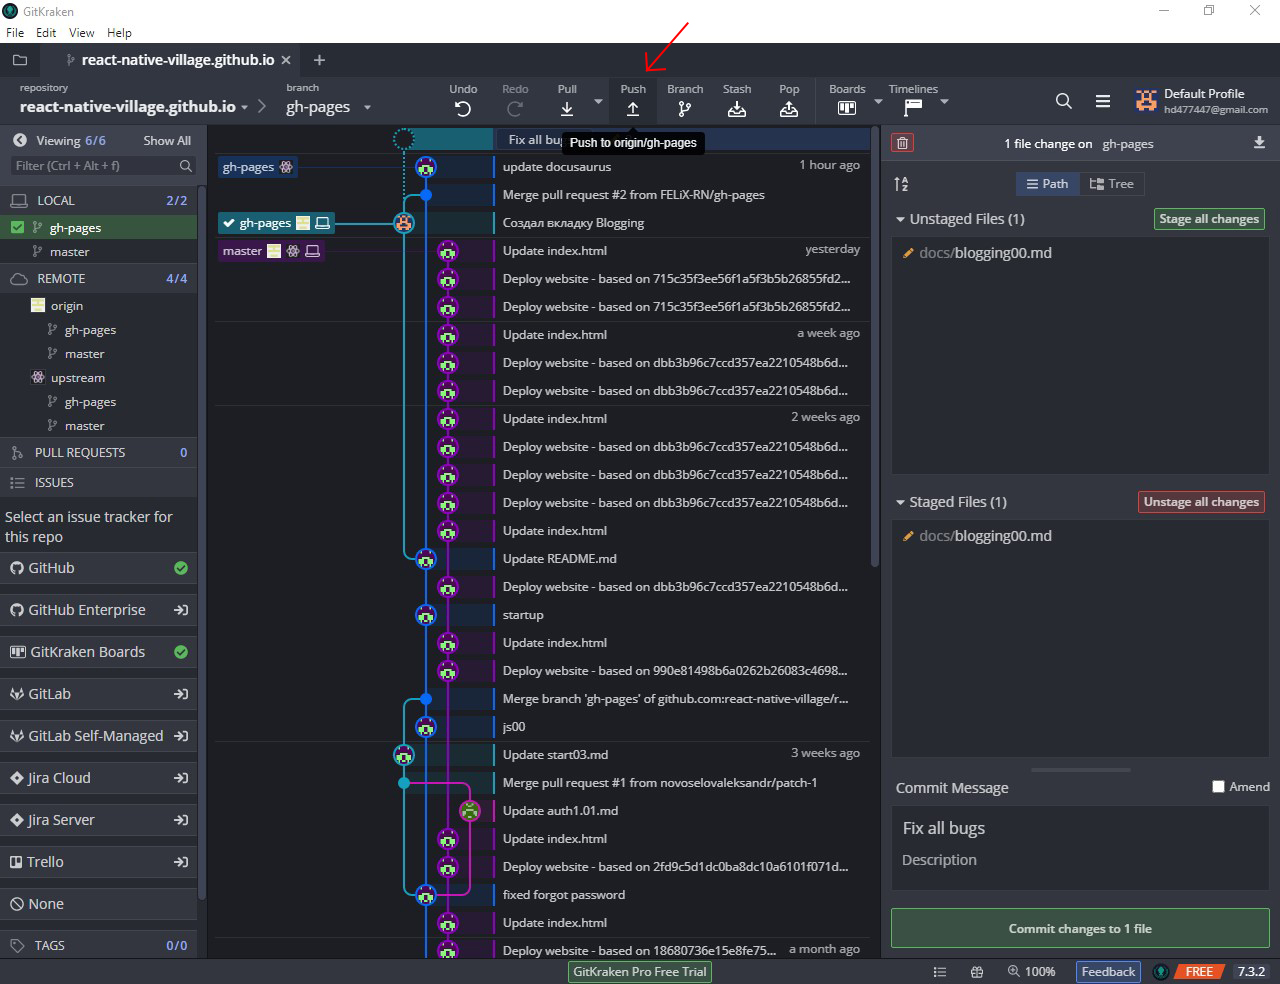
To send changes to the GitHub server, click the button Push.
Now you need to send a request to merge your version of the project code with the main repository. To do this, go to the site GitHub to your copy of the project and select the branch gh-pages.
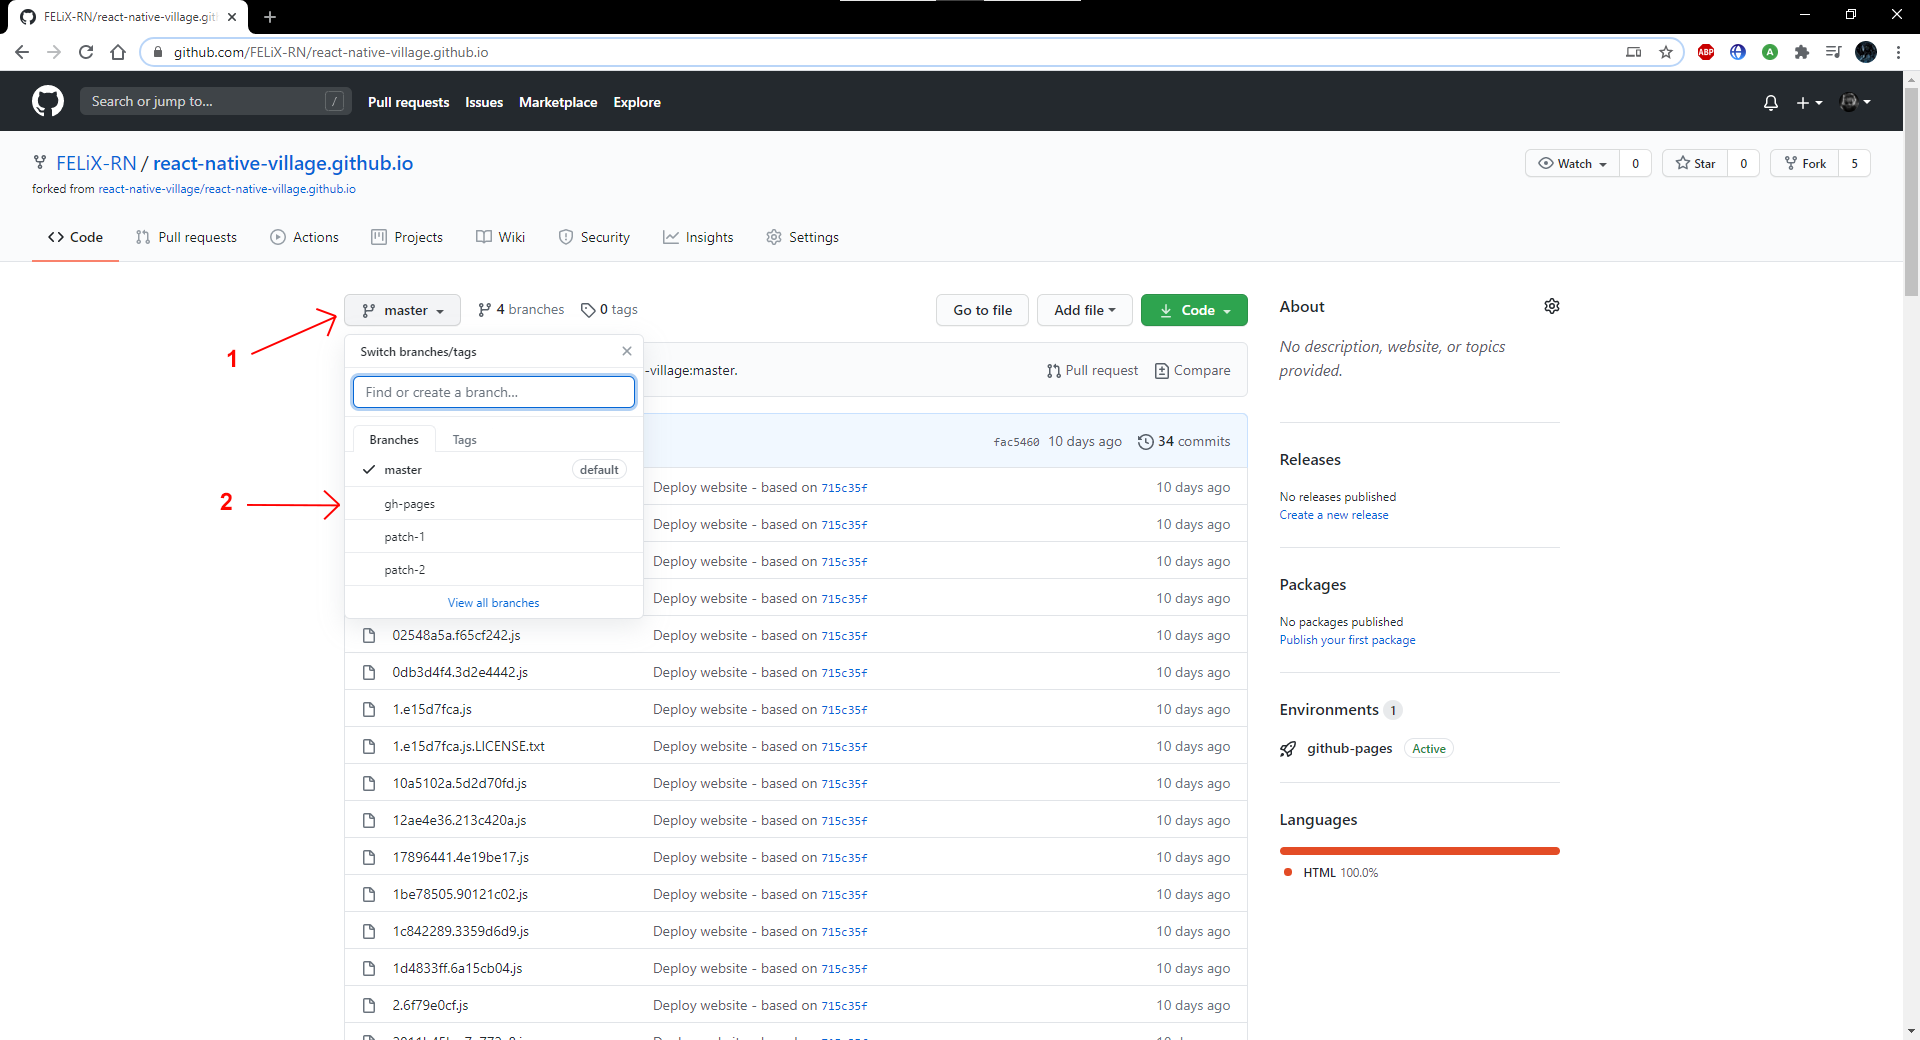
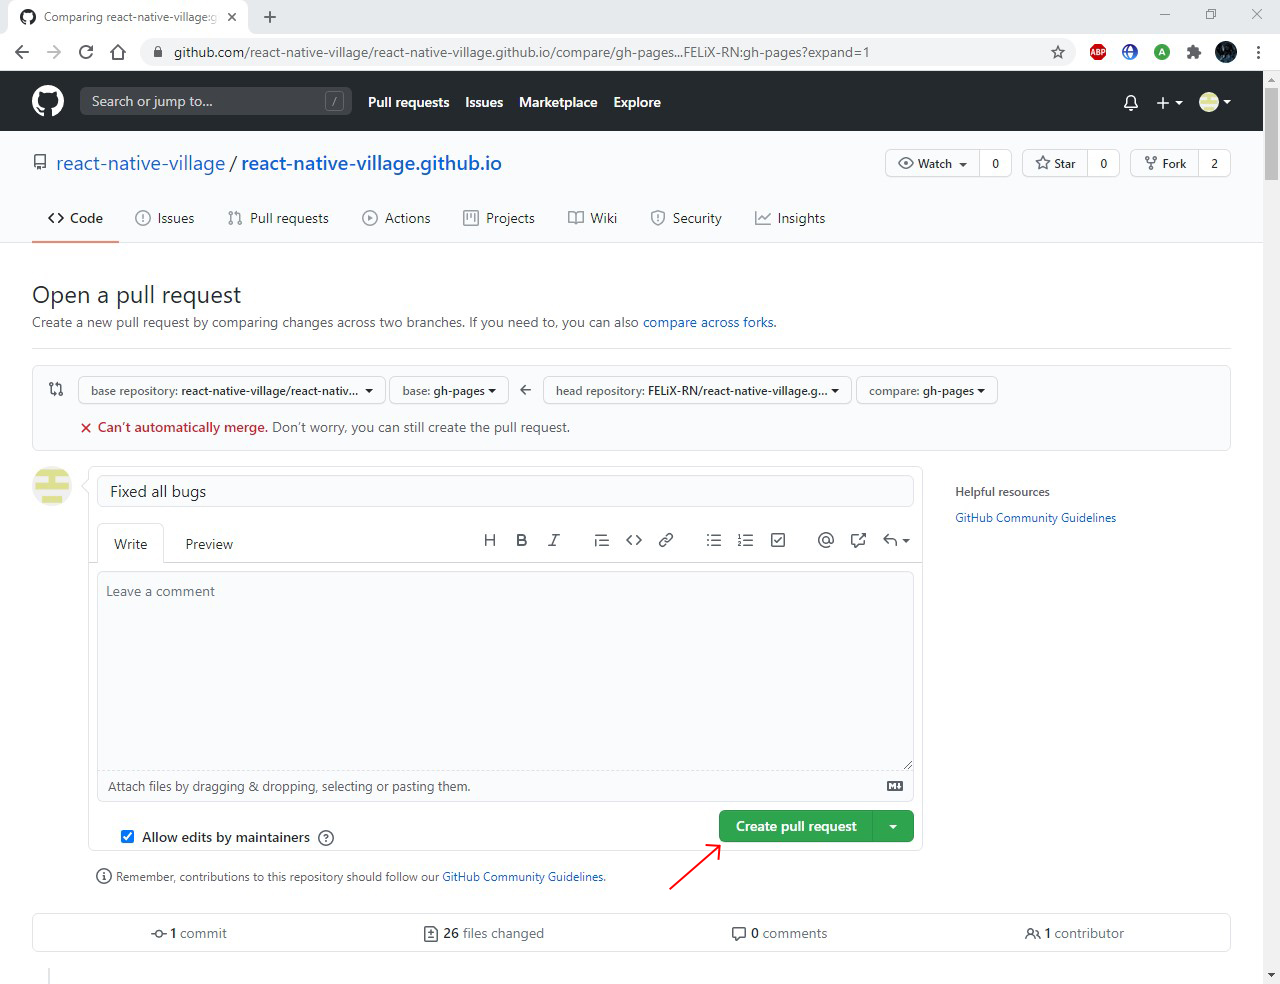
Push the button Pull request.
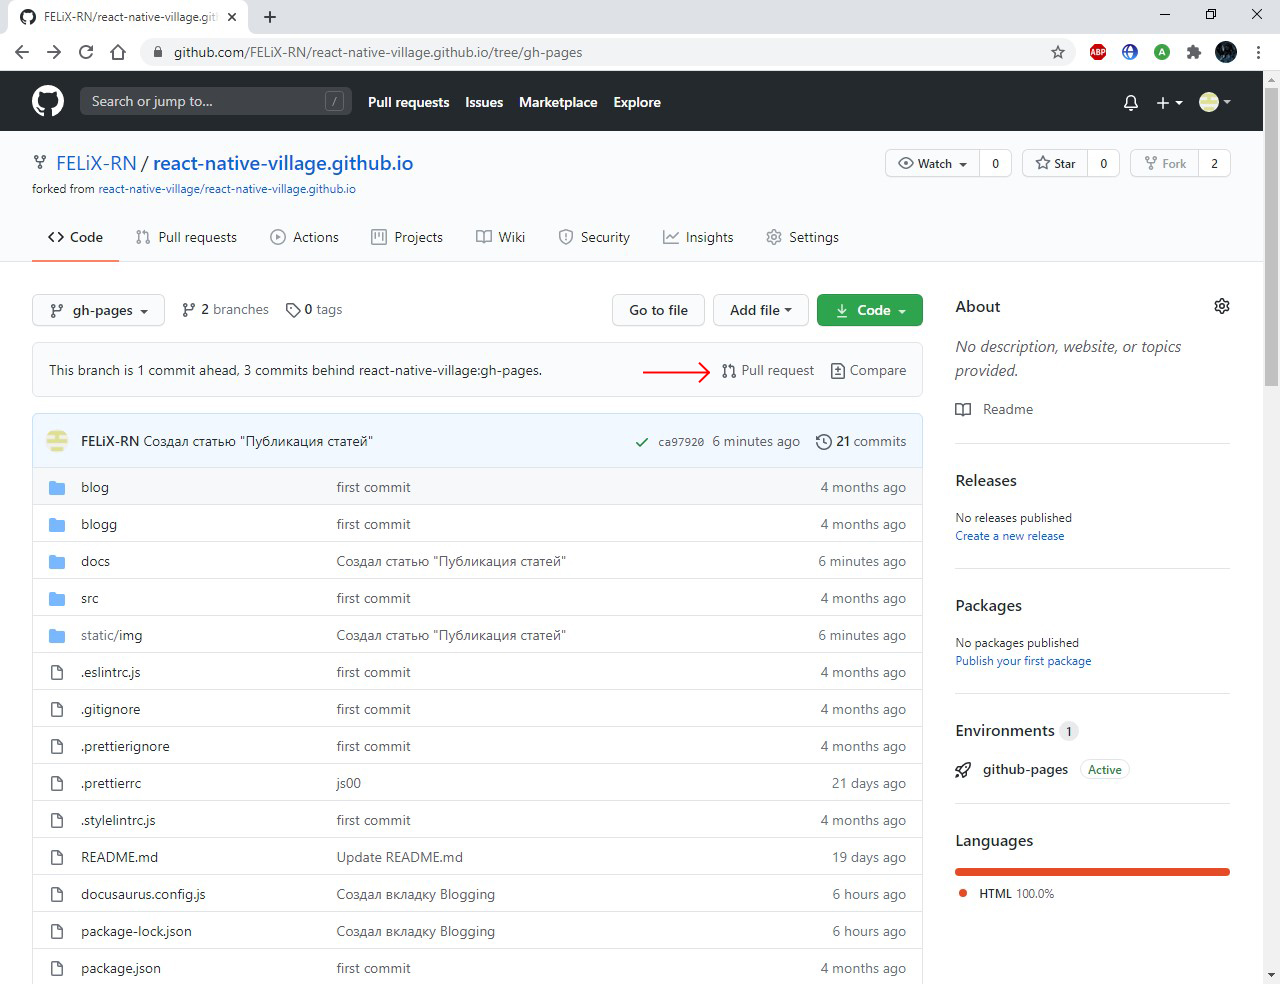
Next, we leave a comment to the reviewer (Reviewer) and press the button Create pull request.
Your project has been sent for review. When the reviewer is convinced that everything is in order, your code will be aligned with the main one. Now your article is available for viewing on any device on the Internet!

Editing an article
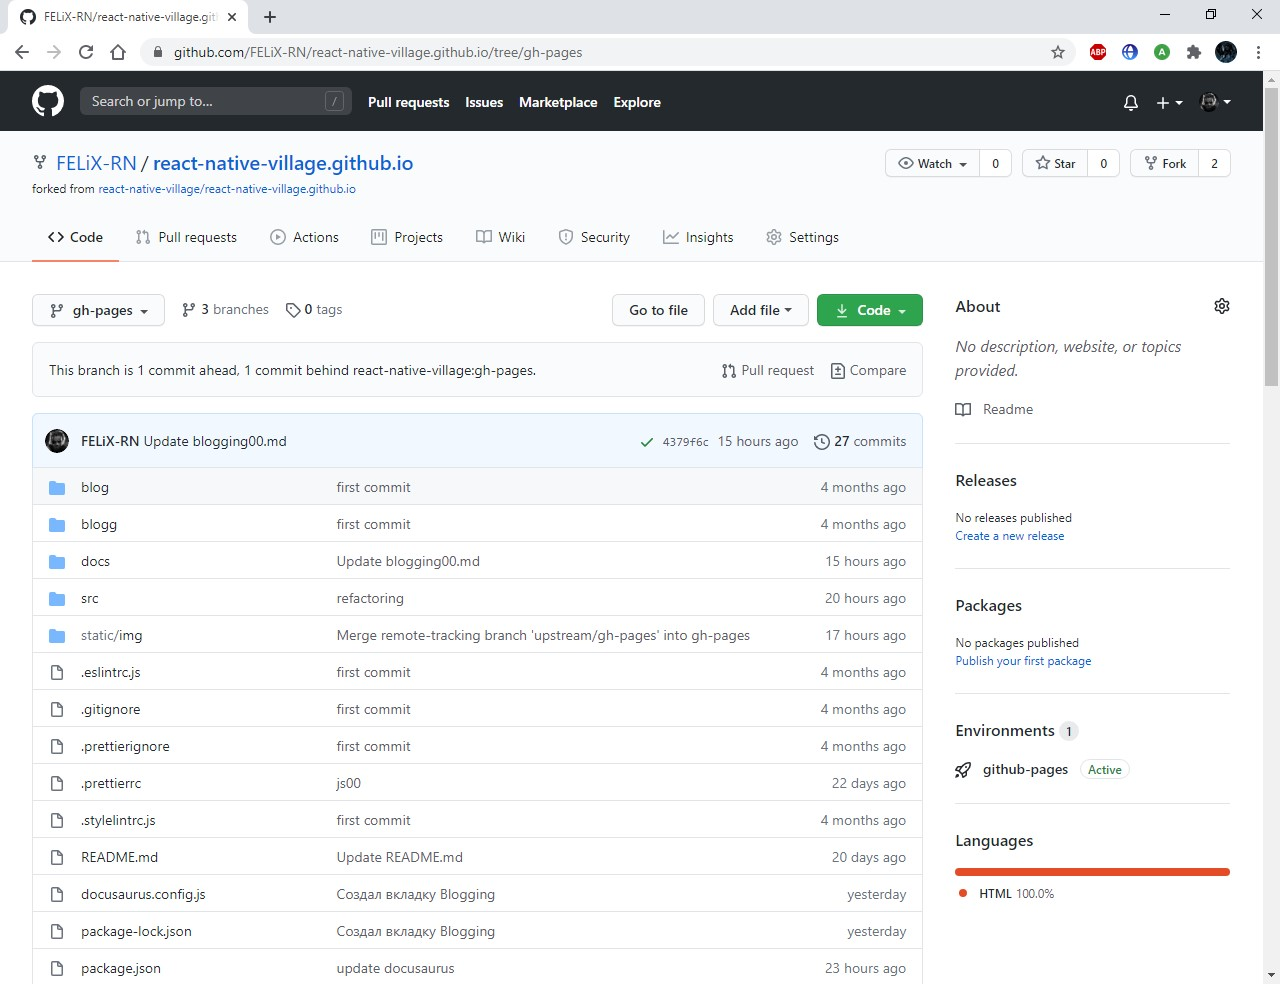
Service GitHub allows you to quickly and conveniently edit existing articles. To do this, go to the GitHub site with your project.
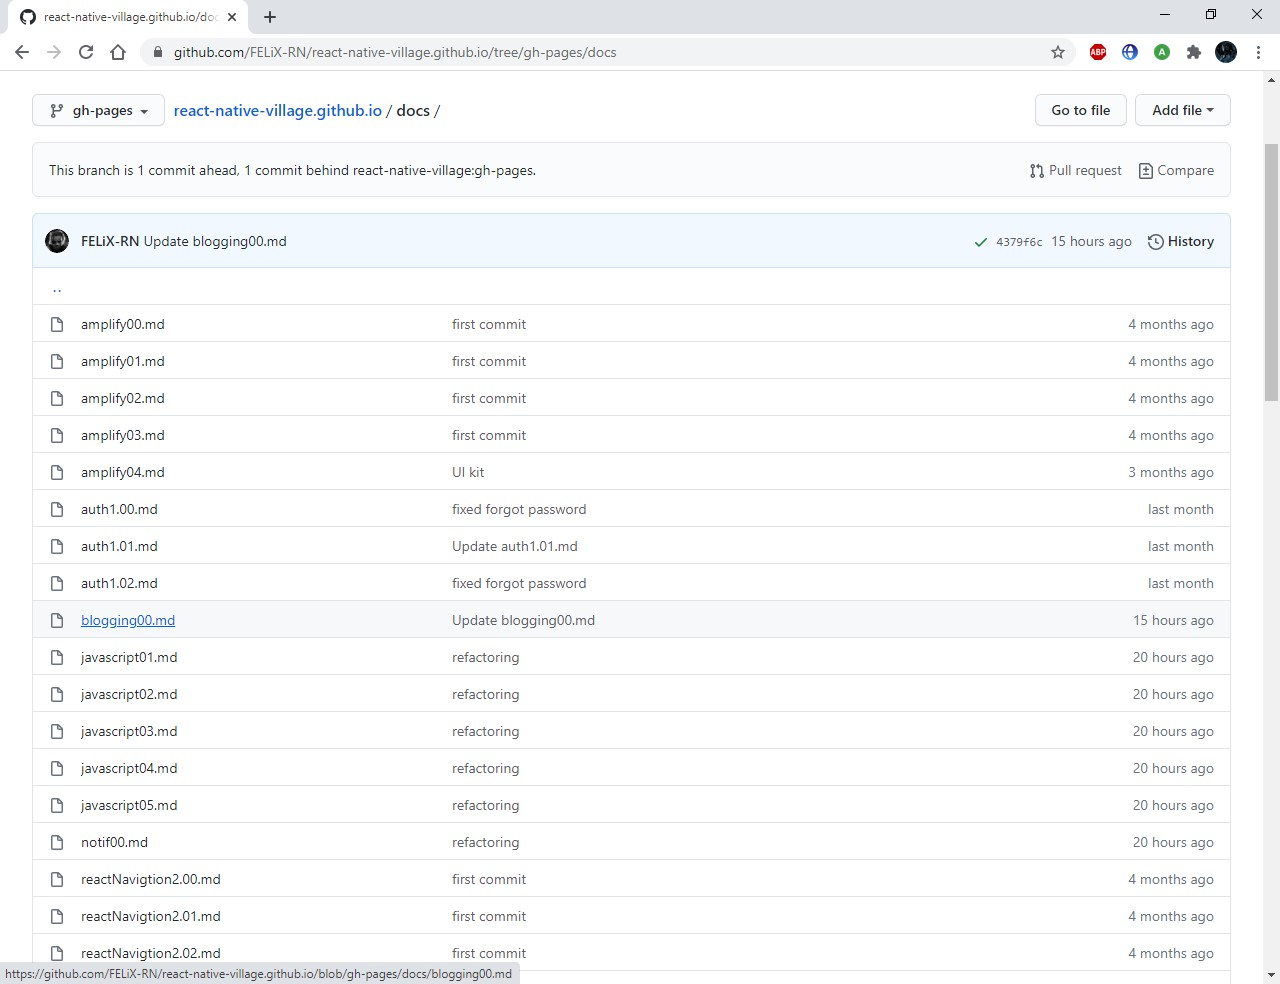
Then we open the required file for editing.
All articles are stored in the docs folder.
Then press the button Edit this file.
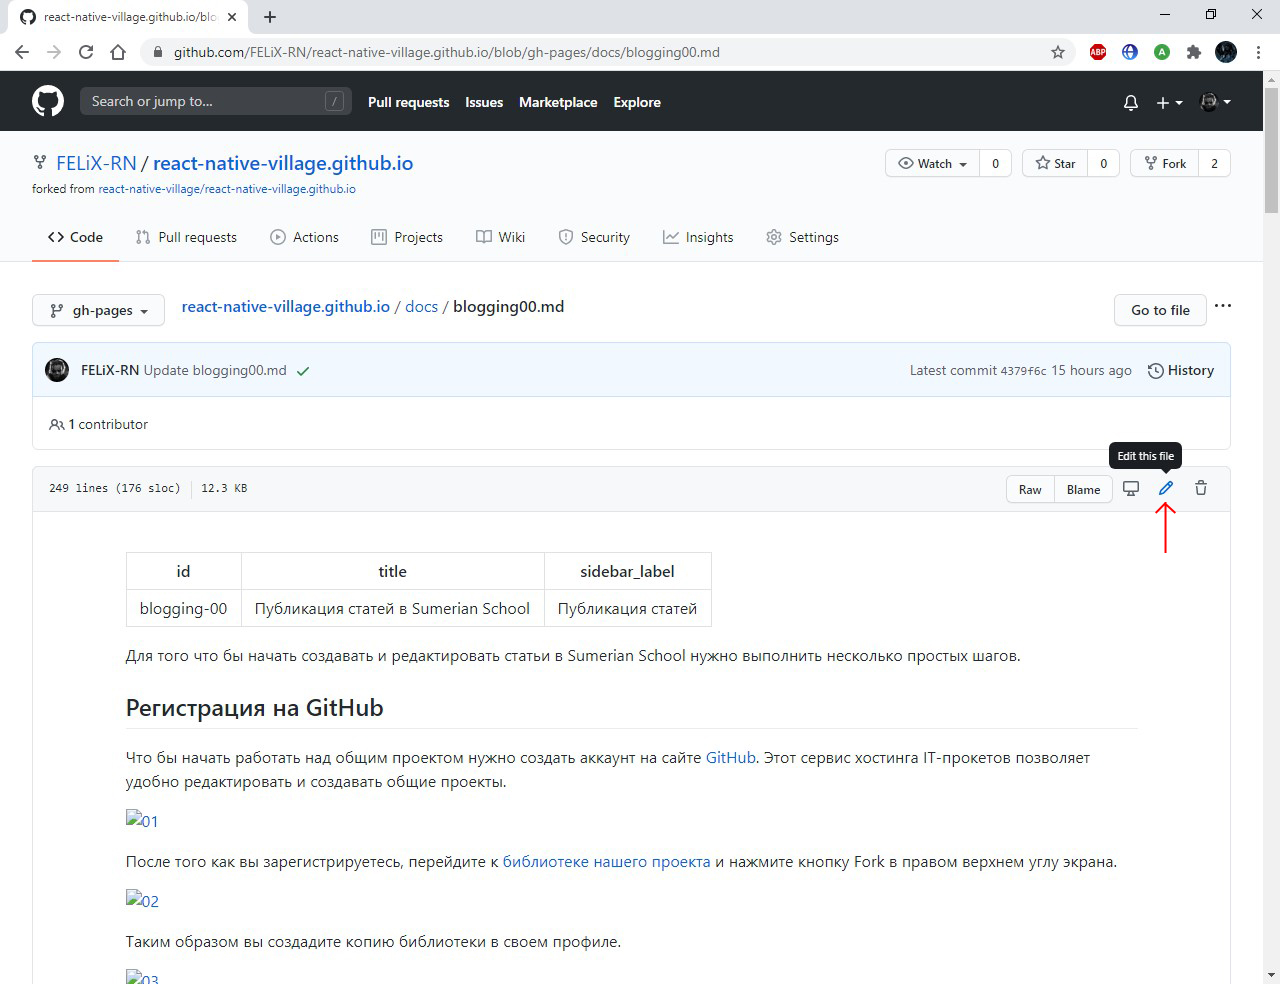
Now you can make the changes you want.
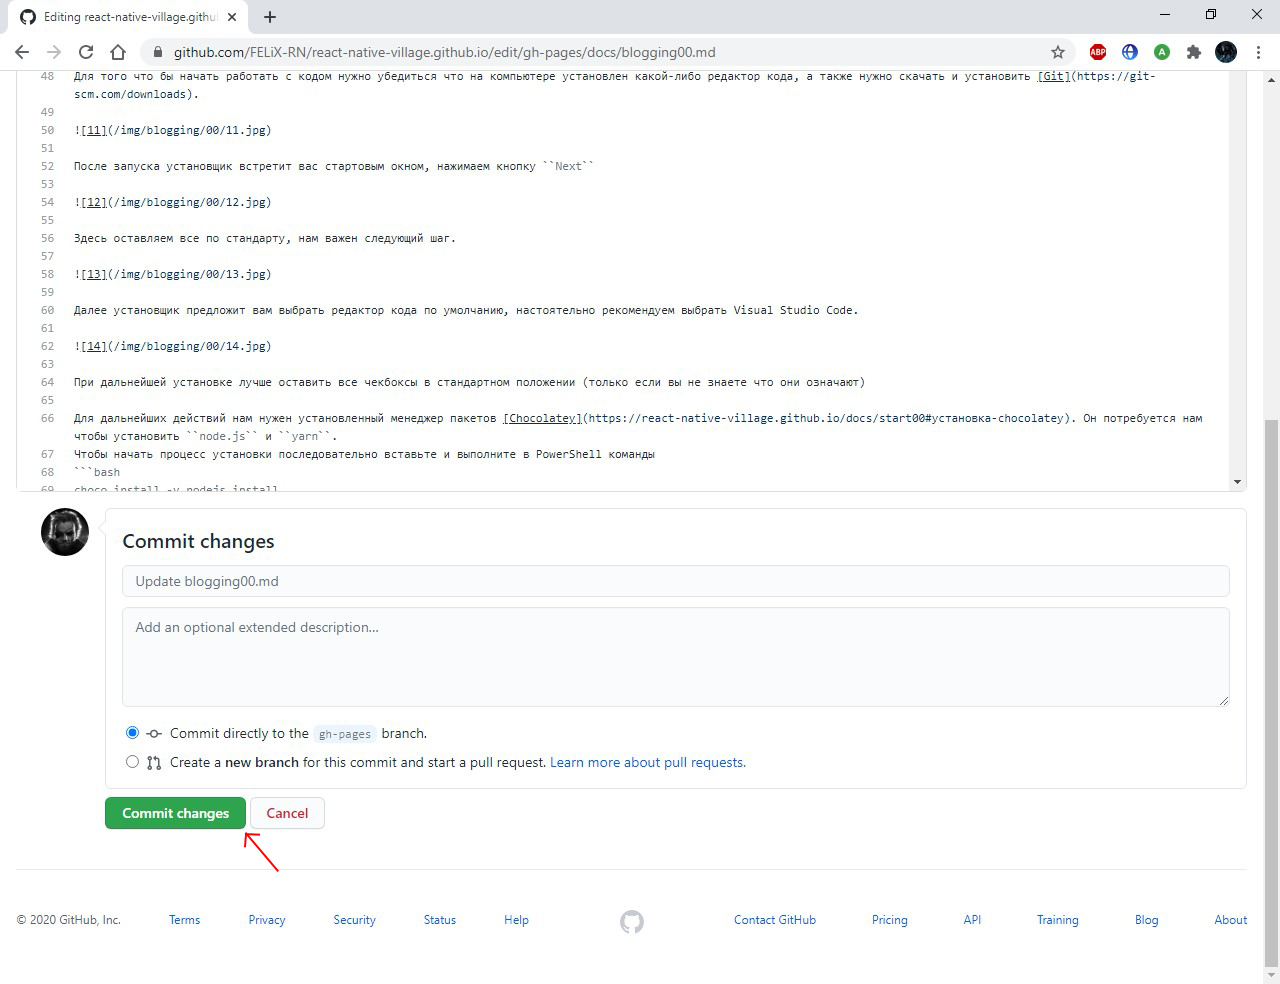
To apply the changes, you need to click on the Commit changes button. If necessary, add a comment to the changes.
As a result, we create a Pull request, as it was shown in the previous topic" Creating an article ". The changes will go to the Reviewer for verification.

Basic text formatting capabilities Docusaurus
All articles on this site are written using Docusaurus. This is a tool with which you can easily create such Internet documents. And like all other similar services, it has its own syntax.
For example, ways to highlight text:
:::note
The note.
:::

:::tip
Hint.
:::

:::info
Information.
:::

:::caution
Warning!
:::

:::danger
Danger!
:::
This is how it will look on the site:
The note.
Hint.
Information.
Warning!
Danger!
You can also give themes to such windows, for example:
:::note Subject
The note.
:::
The note.
To highlight the code, use the expression:
'```jsx
Code
```'
(Expression is used without quotes)
You can also highlight words by adding ``, for example:
``Example``
It will look like: Example
You can make it so that any text can be copied with one button.
'```bash
Example
```'
(Expression is used without quotes)
It will look like:
Example
To insert a link, you must use the following syntax:
[Text that opens a link when clicked] (Link to website)
Images are inserted in the same way.
![Image name to be displayed if image is not available] (Path to image)
To insert an image with a link, use the combined syntax of the previous two commands.
[![Tex] (Path to the picture)] (Link)
These are just the most basic text formatting techniques, you can read more in the official documentation Docusaurus.
Questions:
What is the main function of GitHub?
- Forum for programmers
- Hosting open IT projects for collaboration
- Cloud file storage
What is the function of the Fork button on GitHub?
- Downloads the repository
- Makes a copy of the repository in your profile
- Gives access to the main repository
What extension should the article file have?
- .doc
- .txt
- .md
In which folder are the articles of our project stored?
- docs
- blog
- src
What team are added users involved in the project?
- yarn all-contributors add
- yarn all-contributors generate
- yarn all-contributors init
What does the Pull request button do?
- Sends a request to merge your version of the project code with the main repository
- Submits code changes directly to the main repository
- Saves a copy of the repository
What is Docusaurus?
- Tool for working with code
- Tool for creating internet documents
- Tool for creating markup
Which of the following methods is used to create a selection of text?
- ::note ::
- :::note :::
- "note"
How do I insert an image?
[Text] (Path to image)2.(Text) (Path to image)! [Text] (Path to image)
Links:
- GitHub
- Documentation Docusaurus
- Official site GitKraken
- Official site Visual Studio Code
- Grammar Checker Site LanguageTool
Contributors ✨
Thanks goes to these wonderful people (emoji key):
 Philipp Dvinyaninov |  Dmitriy Vasilev 💵 |  Dmitriy K. 🏫 |  Resoner2005 🐛 🎨 🖋 |