Setting up a working environment on MacOS
This article will help you set up the React Native working environment on the macOS operating system for the iOS mobile operating system.
Components
To work, you need the following components: Node, Watchman, XCode, and the React Native CLI.
You need an editor to create program code. We recommend using VS Code But you can use any other editor you like.
Homebrew
Homebrew - a command line utility in macOS and Linux that allows you to install packages and applications. In short, Homebrew is a package manager for macOS.
/bin/bash -c "$(curl -fsSL https://raw.githubusercontent.com/Homebrew/install/master/install.sh)"
Node.js & Watchman & CocoaPods
Node.js - is a JavaScript server-side development environment. If you've installed Node before, make sure it is version 10 or higher.
brew install node
Watchman - An open source file viewer that monitors files and takes action when they change. Install it to improve performance.
brew install watchman
CocoaPods - it is a powerful yet elegant tool for managing the dependencies of Cocoa libraries that developers use in their iOS and MacOS projects.
sudo gem install cocoapods
XCode
XCode - is an integrated development environment (IDE) for macOS software developed by Apple. The easiest way to install XCode - through Mac App Store. Inside Xcode, you need to install the desired iOS simulator and command line tools.
iOS Simulator
The simulator is installed in the Xcode settings, in order to enter the application settings in the top panel, select Xcode, thenPreferences ...

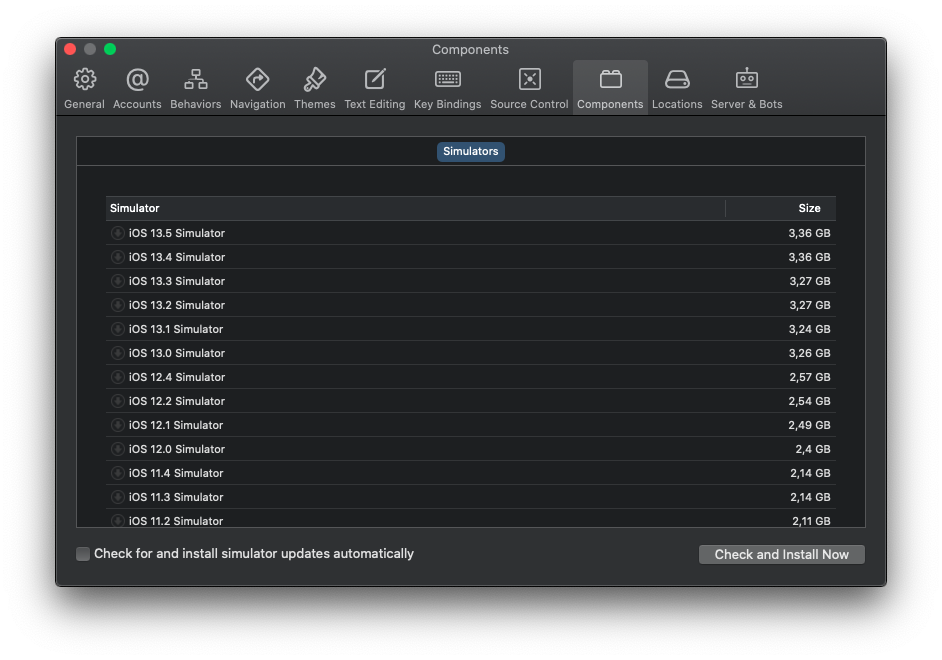
A window with settings will open. To install the simulator, go to the Components tab. The list of available simulators opens, choosing the one you like, install it by clicking on the arrow next to the simulator name.
Command line tools
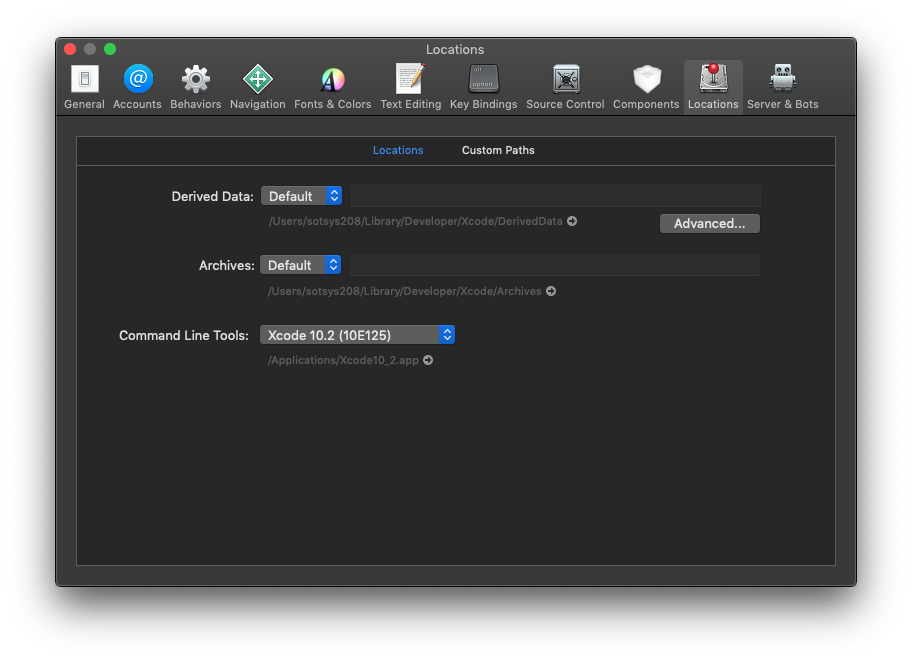
To configure the tools, go to the Locations tab in the Xcode settings. The line Command Line Tools: in the drop-down list select the most recent version of the command line tools.
Creating a ReactNative project
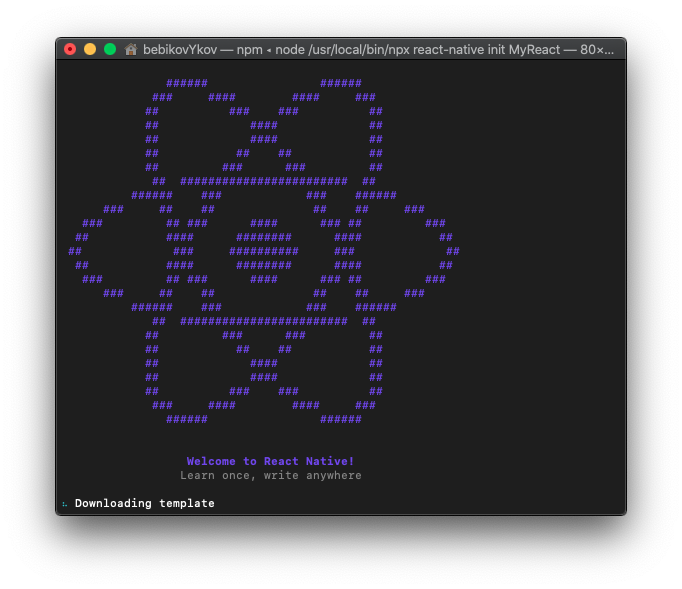
Creating a project and further working with a project in React Native is similar to creating a project in Windows 10. The built-in command line interface React Native npx is used to create a project. Let's create a project called MyReact. After starting the command in the terminal, the process of creating a project will go, it is not quick.
npx react-native init MyReact
Metro Bundler launch
Metro Bundler is a JavaScript builder that comes with React Native. Metro accepts files and input parameters, compiling all JavaScript files into one file. After its launch, we can see in which file Metro has compiled the JavaScript code, it is highlighted in green.
The launch is carried out in the terminal, before starting the command, go to the directory with our project MyReact and write the following command:
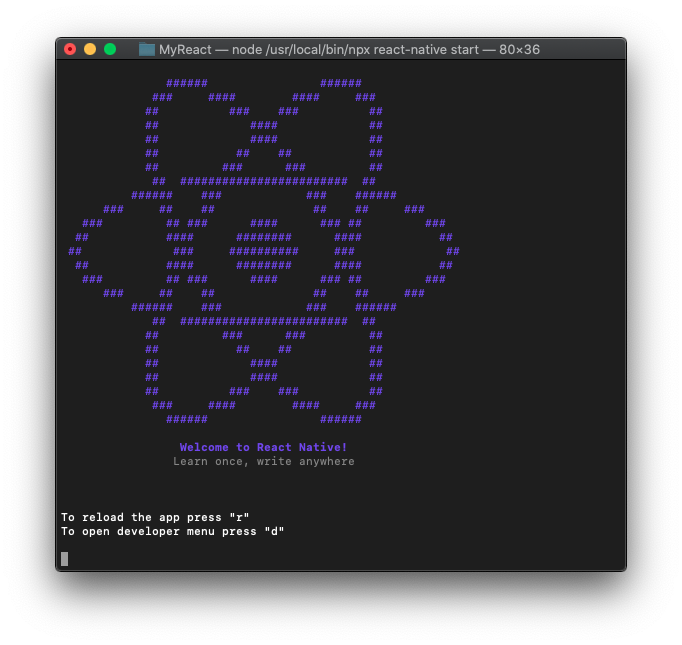
npx react-native start
If no errors were found at startup, we will see the following picture:
Application launch
Do not turn off the terminal where Metro Bundler is running. To launch the application, open a new terminal. This step also requires you to go to the root of the MyReact project. After the transition, execute the command:
npx react-native run-ios
This command will launch the application of the project MyReact in the simulator iOS. If you haven't changed any files in the project, you should see a greeting from React Native.
VS Code
As mentioned at the beginning of this article, any editor will work, but we recommend using VS Code. To install the recommended editor, you can use the previously specified Homebrew package manager, for this you need to write the following command in the terminal:
brew cask install visual-studio-code
After installing VS Code, launch it. To open the project MyReact in the main menu we find the lineOpen folder ..., by clicking on which a dialog box will open, in which you need to select the folder with our project MyReact.
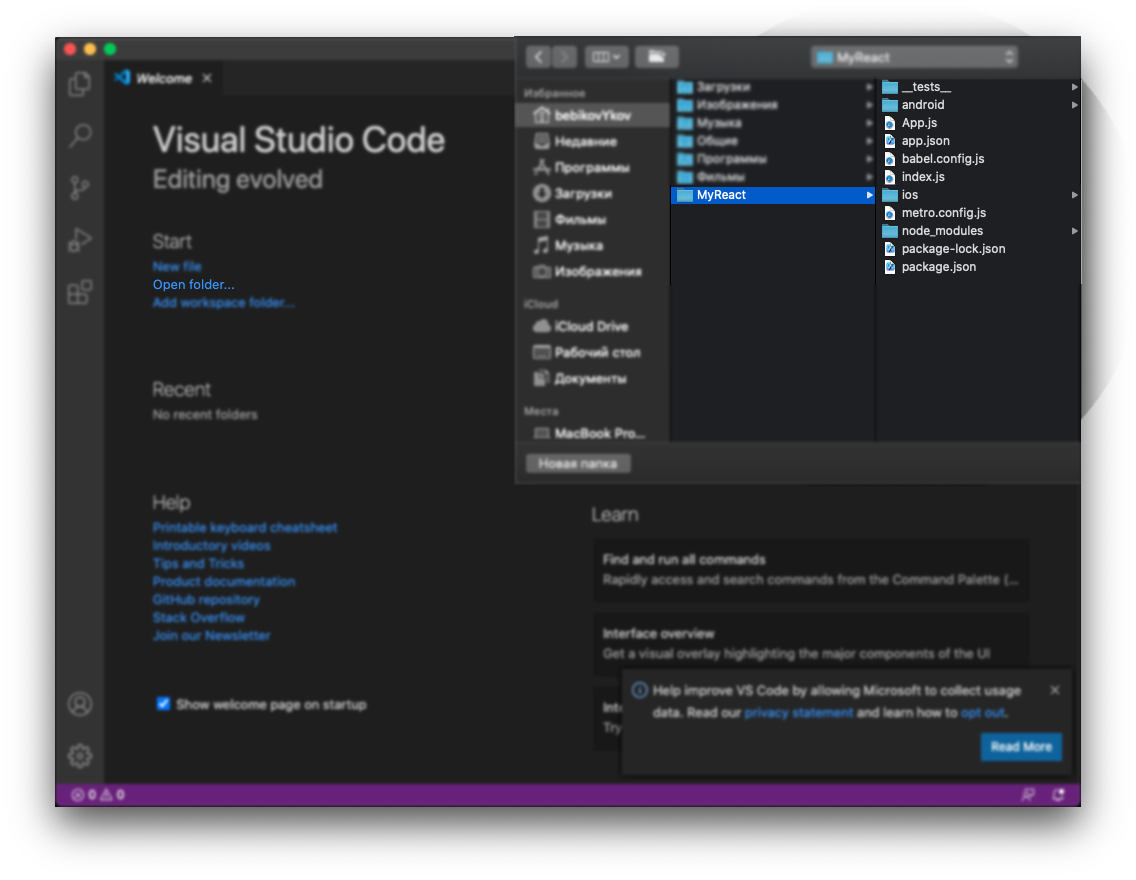
After selecting a project, the Navigator navigation panel will appear for working with the project.
Hello World
After we have installed and launched VS Code, we can start working. To do this, open the file App.js in the root of the project. This file describes what the user will see when the application starts. On first launch, we saw a greeting from React Native. We can change several lines and when saving, the picture on the simulator will change. Replace all the code in the App.js file with the one below and save the file:
import React from 'react'
import { StyleSheet, Text } from 'react-native'

const App = () => {
  return (
    <>
      <Text style={styles.h1}>Hello World</Text>
    </>
  )
}

const styles = StyleSheet.create({
  h1: {
    backgroundColor: '#BEFCE5',
    color: '#000',
    fontSize: 25,
    fontWeight: '700',
    padding: 20,
    textAlign: 'center'
  }
})

export default App
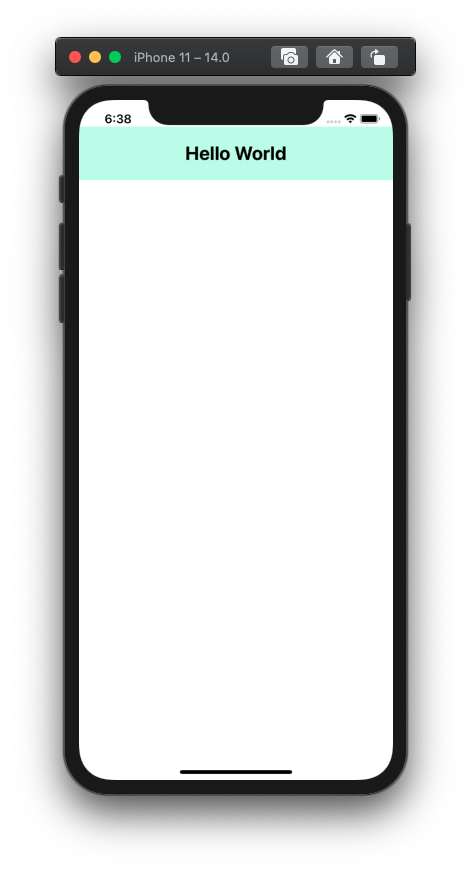
It's that simple!
To see how well you learned this lesson, take the test in the mobile application of our school on this topic or in the telegram bot.

Links
Contributors ✨
Thanks goes to these wonderful people (emoji key):
 IIo3iTiv |  Dmitriy Vasilev 💵 |